Does the gap under the door let in a draft all winter, adding several hundred NT dollars to the electricity bill?
In summer, however hard the air conditioner works, does hot air still seep in through the door gap? Is there dust at home that never seems to be swept away, all of it coming in under the door?
To solve these problems, what you need is a "strip brush".
But there are countless strip brushes on the market: aluminum alloy, stainless steel, self-adhesive, screw-fixed... How do you choose? How do you measure the size? And where do you buy one? This article shows you step by step how to choose and install a strip brush, so that a small outlay solves a big problem.
This article is a practical follow-up to The complete guide to brush manufacturing | strip brush section, with more detailed DIY installation steps and buying tips.

What is a strip brush? 7 application scenarios explained
A strip brush (also called a brush strip) is a long, strip-shaped brush product.
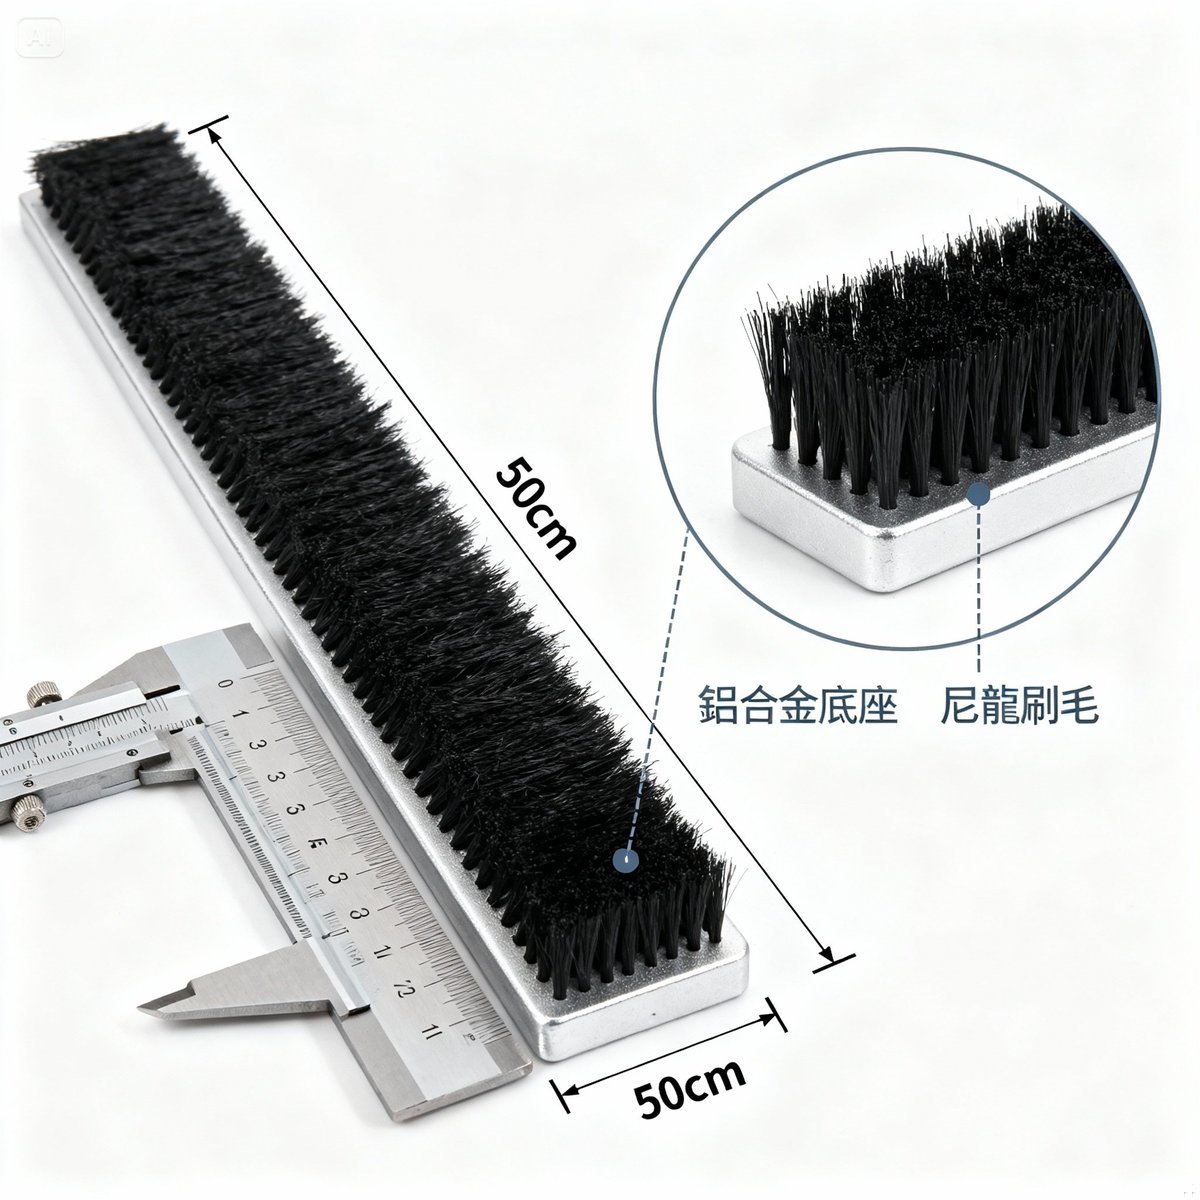
It consists of a "base" and "filament".
The base is usually aluminum alloy or stainless steel, and the filament is nylon, PP or natural hair. It is fixed to a door or window with screws or an adhesive backing to seal the gap and keep out dust and drafts.
7 application scenarios for strip brushes
1. Door gap sealing
The most common use!
- Sealing the bottom of an entrance door (against drafts, dust and insects)
- Sealing the bottom of a room door (sound insulation, blocking light)
- Sealing the bottom of a rolling shutter door (against rain and drafts)
2. Window sealing
- Sealing strips for airtight windows
- Filling the gaps of aluminum windows
- Sealing the tracks of sliding windows
3. Elevator guide rails
- Anti-pinch function for elevator doors
- Quiet cushioning for elevator doors
- Keeping dust out of the guide rails
4. Automatic doors
- Sealing the bottom of automatic doors
- Cushioning strips for automatic doors
- Dust protection for automatic doors
5. Industrial dust protection
- Inlets and outlets of CNC machines
- Side guards on conveyor belts
- Sealing gaps in machinery
6. Automotive equipment
- Cleaning brushes for car wash machines
- Sealing strips for car doors
- Sealing the trunk
7. DIY at home
- Reinforcing the seal of a refrigerator door
- Dust protection for cabinets
- Sealing the gap of a balcony door
Want to know about strip brush specifications and selection for industrial applications? See The complete guide to industrial brushes | machinery applications.
Strip brush types and specifications compared
Choosing the right type is the first step to success.
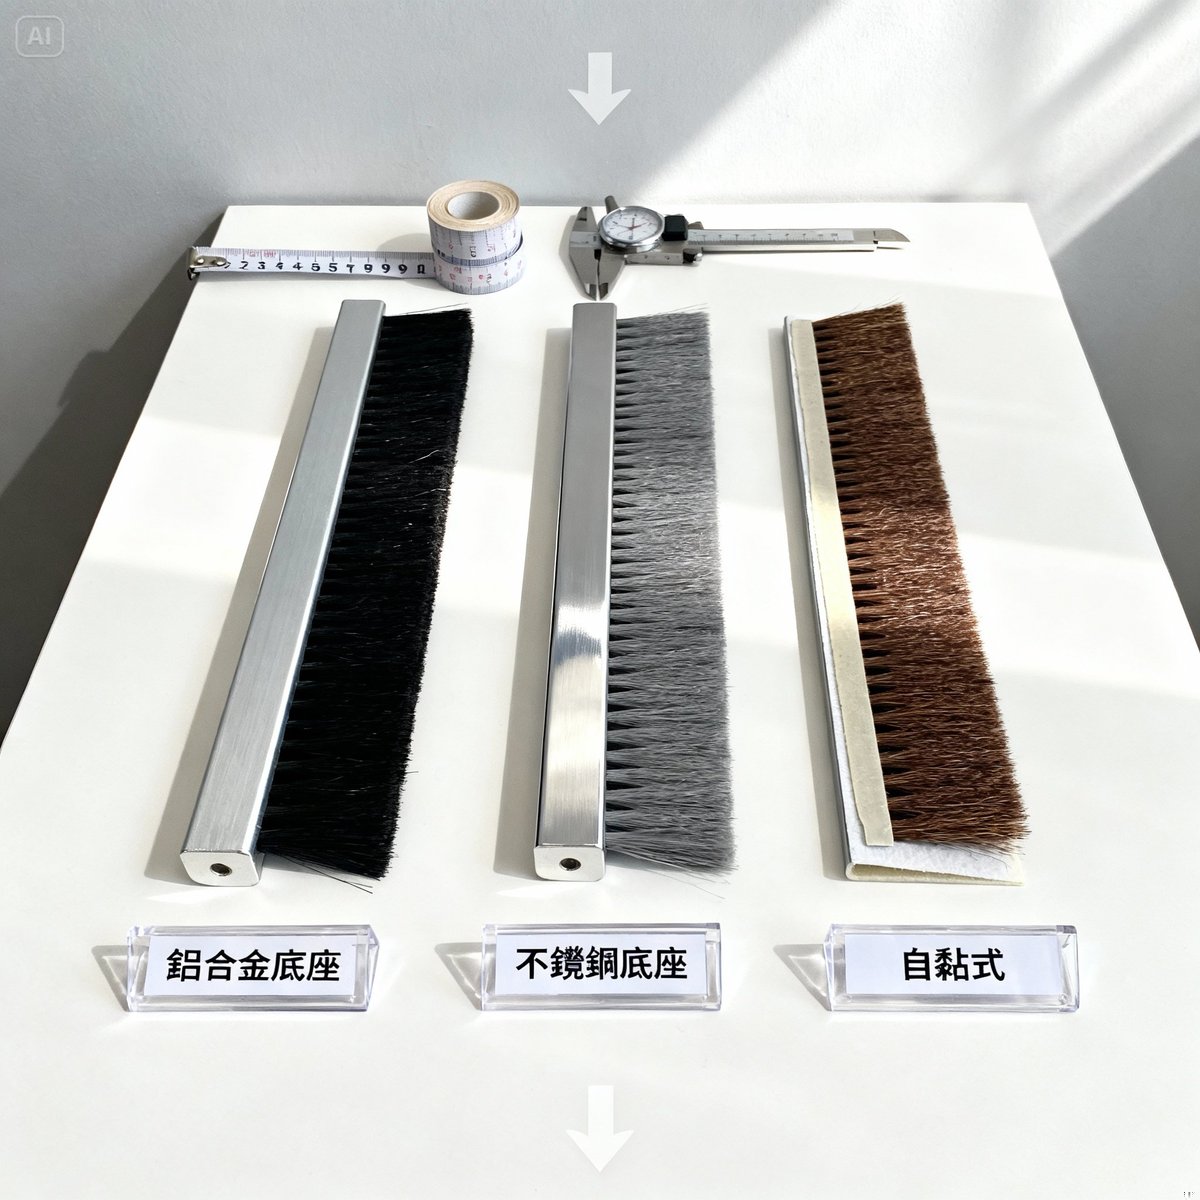
By base material
Strip brush with an aluminum alloy base
Advantages:
- Light, does not rust easily
- Moderate price
- Easy to cut and install
- The most common, with the widest range of sizes
Disadvantages:
- Slightly less strong than stainless steel
- Not suited to highly corrosive environments
Suitable for:
- Doors and windows of ordinary homes (recommended)
- Office door gaps
- Interior partitions
Price: mid-range (100 cm; actual retail prices are as marked by each channel)
Strip brush with a stainless steel base
Advantages:
- The strongest, extremely durable
- Corrosion resistant, rust proof
- A premium look and feel
- Long life (5 years or more)
Disadvantages:
- Higher price
- Heavier
- Harder to cut (needs professional tools)
Suitable for:
- Seaside environments (where rust protection is needed)
- Factories and warehouses (where high strength is needed)
- Rolling shutter doors (for large doors)
Price: upper mid-range (100 cm; actual retail prices are as marked by each channel)
Strip brush with a plastic base
Advantages:
- The cheapest
- Extremely light
- Easy to cut
Disadvantages:
- Low strength, deforms easily
- Not heat resistant
- Short life (1-2 years)
Suitable for:
- Temporary sealing
- Light doors
- Very limited budgets
Price: budget (100 cm; actual retail prices are as marked by each channel)
By filament material
PP (polypropylene) filament
- Characteristics: soft, weather resistant, good resilience
- Heat resistance: up to 80°C
- Life: 2-3 years
- Price: economical
- Suitable for: general door and window sealing
Nylon filament
- Characteristics: wear resistant, heat resistant, does not deform easily
- Heat resistance: 120-150°C
- Life: 3-5 years
- Price: medium
- Suitable for: doors opened and closed frequently, industrial use
Horsehair
- Characteristics: premium, seals well, quiet
- Heat resistance: up to 60°C
- Life: 5 years or more
- Price: the highest
- Suitable for: high-end homes, where quietness is required
By fixing method
Screw-fixed
Advantages:
- The most secure, does not come off easily
- Can be removed and refitted repeatedly
- Suits door leaves of all materials
Disadvantages:
- Needs drilling (which damages the door leaf)
- Takes longer to install
Suitable for: permanent installation, large doors
Self-adhesive backing
Advantages:
- Extremely simple DIY (just stick it on)
- No drilling (no damage to the door leaf)
- Quick to install
Disadvantages:
- The adhesion weakens over time
- Not suited to heavy doors
- May come off in high summer temperatures
Suitable for: renters, temporary use, light doors
Snap-in
Advantages:
- Can be replaced quickly
- No drilling, no adhesive
- Suits door frames of specific specifications
Disadvantages:
- Needs a dedicated track
- Many restrictions on specification
- Not widely available
Suitable for: industrial equipment such as elevator doors and automatic doors
Not sure which specification to choose? Contact YC Brushes now. We offer free buying advice and will help you choose the most suitable strip brush specification.
Measuring for a strip brush in 3 steps
Measure wrongly, and the brush you bring home will not fit: money wasted!
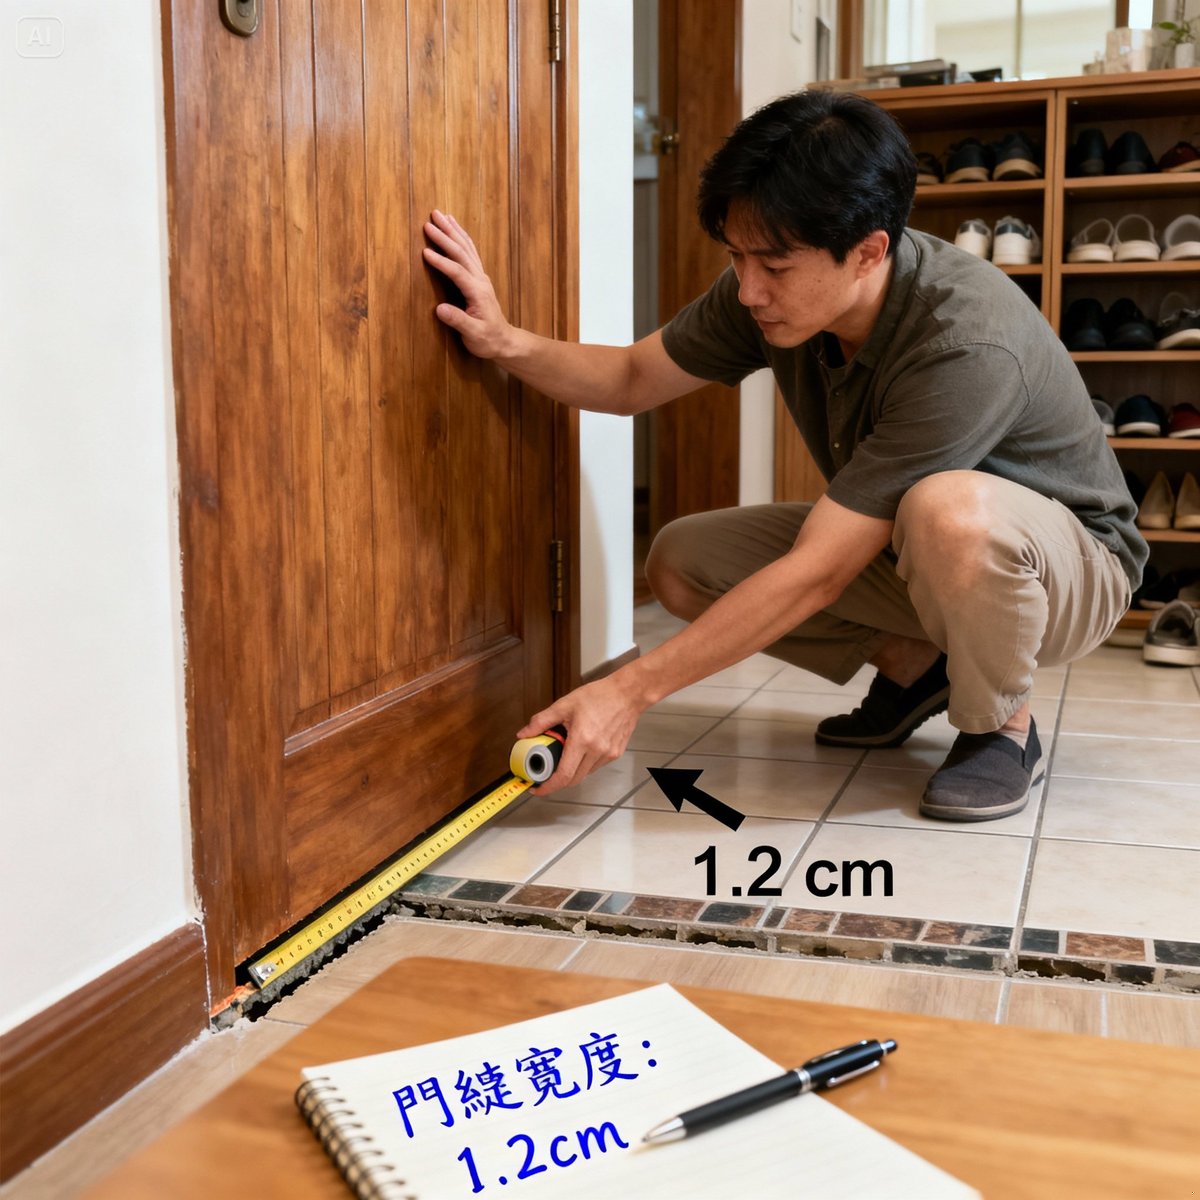
Step 1: Measure the door gap
Tool: tape measure or ruler
How to measure:
- Close the door
- From indoors, measure the distance from the bottom of the door leaf to the floor
- Measure at several points across the width of the door and record the largest and smallest values (the door leaf or the floor may not be perfectly level); base the trim length on the largest value (the lowest point of the floor), then check that the door will not catch where the gap is smallest
Buying advice:
- Gap below 0.5 cm → buy a strip brush with a trim length of 10-15 mm
- Gap of 0.5-1 cm → buy a strip brush with a trim length of 20-30 mm
- Gap of 1-2 cm → buy a strip brush with a trim length of 40-50 mm
- Gap above 2 cm → buy a strip brush with a trim length of 60 mm or more
Important reminder: The trim length must be slightly greater than the gap to seal effectively. But it must not be too long, or the door will catch and be hard to open and close.
Step 2: Measure the width of the door leaf
Tool: tape measure
How to measure:
- Measure the actual width of the door leaf
- Record the exact value (unit: centimeters)
Buying advice:
- Standard door (80-90 cm): buy a 100 cm strip brush and cut off the excess
- Wide door (100-120 cm): buy 120 cm or a made-to-order size
- Rolling shutter door (200 cm or more): made to order by a factory is recommended
Cutting tip: An aluminum alloy base can be cut easily with a hacksaw. A stainless steel base needs an angle grinder, or ask a hardware store to cut it for you.
Step 3: Measure the space for the base
Tool: calipers or ruler
How to measure:
- Measure the thickness of the bottom of the door leaf
- Confirm that there is enough space to fit the base
Base height reference:
- Standard base: 8-10 mm high
- Thick base: 12-15 mm high
- Ultra-thin base: 5-7 mm high
What if there is not enough space?
- Choose the ultra-thin base type
- Or switch to the self-adhesive type (which takes up no vertical space)
- Or install it on the outside of the door instead of the inside
Want to see a video demonstration of actual measuring? See the YC Brushes product page, which has detailed size specifications.
Where to buy strip brushes? Purchasing channels compared
Now you know what to buy. Where should you buy it? (The retail channels below describe the Taiwan market.)
Purchasing channel comparison
| Channel | Price | Advantages | Disadvantages | Recommendation |
|---|---|---|---|---|
| Showba (a Taiwanese general-goods chain) | Budget | Convenient, in stock, can be seen in person | Few specifications, average quality, no custom work | ★★★☆☆ |
| TLW (a Taiwanese home-improvement chain) | Mid-range | Good quality, cutting service, professional advice | Higher prices, specifications still limited | ★★★★☆ |
| Online marketplaces (Shopee / Ruten) | Budget to mid-range | Wide choice, low prices, home delivery | Unstable quality, cannot be seen in person, shipping cost | ★★★☆☆ |
| Hardware stores | Budget to mid-range | Can cut to size, buy and use at once, professional advice | Few specifications, slightly higher prices | ★★★★☆ |
| Factory-direct (YC Brushes) | NT$50-250 | Custom sizes, volume discounts, assured quality, free advice | Order by phone or online, no discount on small quantities | ★★★★★ |
Each channel in detail
Showba
Suitable for:
- Urgent needs, to be used the same day
- Limited budgets
- Doors and windows of standard sizes
Not suitable for:
- Special size requirements
- High quality requirements
- Large-volume purchasing
TLW
Suitable for:
- A first purchase (advice available on the spot)
- Buyers who need a cutting service
- Buyers who care about quality
Not suitable for:
- Limited budgets
- Large-volume purchasing (no significant discount)
Online marketplaces
Suitable for:
- Comparing prices, finding special specifications
- Buyers with no physical store nearby
- Buyers who have already settled on a specification and brand
Not suitable for:
- Buyers unsure of the specification (hard to return a wrong purchase)
- Immediate use
- Buyers worried about quality (cannot be seen in person)
Factory-direct (YC Brushes)
Suitable for:
- Custom size requirements
- Large-volume purchasing (100 pieces or more)
- Buyers who need professional advice
- Special material requirements (horsehair, stainless steel and so on)
Not suitable for:
- Buyers who only need 1-2 pieces to try
- Same-day pickup
The advantages of buying from YC Brushes
Custom size service
- Any length made to order (50 cm-500 cm)
- Any trim length (10 mm-100 mm)
- Special base widths
Volume discounts
- 100 pieces or more: 20% off (80% of list price)
- 500 pieces or more: 30% off (70% of list price)
- 1000 pieces or more: 35% off (65% of list price; negotiable)
Quality assurance
- Over 40 years of manufacturing experience
- Filament imported from Germany
- Aluminum alloy base that does not deform easily
- Samples provided for testing
Free services
- Free advice on specifications
- Free advice on measuring
- Free installation guidance
- Free shipping on large orders
🛒 Not sure which strip brush to buy?
Contact YC Brushes for free buying advice, or see the full product catalog to find the strip brush specification that suits you best.
Strip brush installation | 3 fixing methods in detail
You have brought it home. How do you fit it?
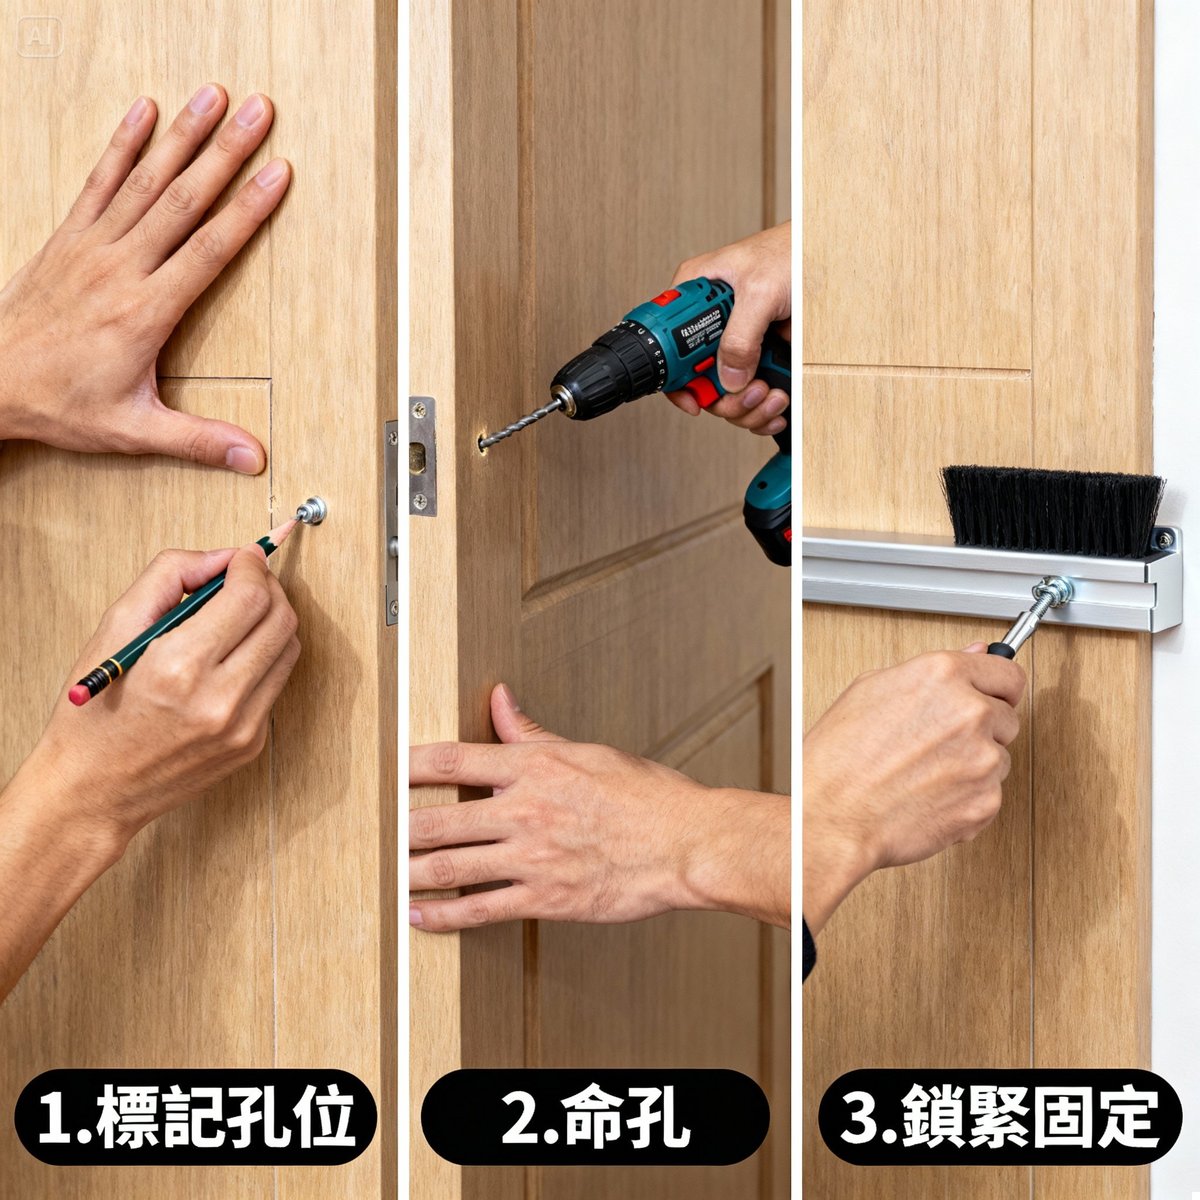
Screw-fixed installation (the most secure)
Tools needed:
- Electric screwdriver or screwdriver
- Drill bit (chosen to match the screw size)
- Pencil
- Tape measure
- Spirit level (optional)
Installation steps:
Step 1: Position and mark
- Place the strip brush in its intended position at the bottom of the door leaf
- Mark the screw hole positions with a pencil
- Confirm that the position is correct (check with a spirit level)
Step 2: Drill
- Drill holes at the marks with an electric drill
- Drill slightly deeper than the length of the screws
- Keep the drill perpendicular
Step 3: Fix the strip brush
- Line the strip brush up with the holes
- Fit the screws at both ends first (do not tighten them)
- Once the position is confirmed, fit the middle screws
- Finally tighten them all
Step 4: Test
- Open and close the door several times and check whether it catches
- Check the seal
- If the filament is too long, adjust the height slightly
Notes:
- Do not tighten all the screws at once (the brush shifts easily)
- Before drilling, confirm that there are no wires or pipes inside the door
- Do not overtighten the screws (the base may be crushed)
Self-adhesive installation (the simplest)
Tools needed:
- Cleaner (alcohol or a stain remover)
- Dry cloth
- Tape measure
- Pencil
Installation steps:
Step 1: Clean the surface
- Clean the bottom of the door leaf with the cleaner
- Remove dust, grease and moisture
- Wipe clean with the dry cloth
- Wait until it is completely dry (important!)
Step 2: Position
- Without peeling off the backing, put the brush in place temporarily
- Mark the position with a pencil
- Confirm that the position is correct
Step 3: Stick
- Peel the protective film off the adhesive backing
- Stick it on slowly, starting from one end
- Press it down firmly by hand as you go
- Make sure the whole length is in close contact
Step 4: Apply pressure
- Weigh the strip brush down with a heavy object for 30 minutes
- Or hold it in place temporarily with tape
- Avoid opening and closing the door frequently for 24 hours
Tips for better adhesion:
- Warm the adhesive backing with a hair dryer before use (it improves adhesion)
- Warming is recommended when the temperature is below 15°C
- Extra strong glue can be applied for reinforcement (at both sides)
Notes:
- The surface must be completely dry (moisture reduces adhesion)
- Not suited to rough or uneven surfaces
- The adhesive may fail in high summer temperatures (switching to the screw-fixed type is recommended)
Snap-in installation (for specific equipment)
Suitable for:
- Door frames that already have a dedicated track
- Elevator doors
- Automatic doors
- Industrial equipment
Installation steps:
- Confirm that the track specification matches the strip brush
- Line the base of the strip brush up with the track
- Slide it in from one end
- Make sure it is fully locked in place
Advantages:
- Can be replaced quickly
- No drilling, no adhesive
Disadvantages:
- The specification must match exactly
- Not suited to ordinary doors and windows
Want to see an actual installation demonstrated? See The complete guide to brush manufacturing | strip brush section, which explains strip brush applications in more detail.
FAQ
It is installed, but something is not quite right? Here is how to troubleshoot the 3 main problems met after installation.
The door is hard to open and close, and it sticks
Possible causes:
- The filament is too long and creates too much friction with the floor
- The base is installed too low
- The filament is too dense or too stiff
Solutions:
- Adjust the height: move the strip brush up by 2-3 mm
- Trim the filament: trim overlong filament with scissors or a utility knife
- Change the specification: switch to a shorter or softer filament
Prevention:
- Measure the door gap correctly before buying
- Choose a trim length only slightly greater than the gap (not too long)
- When trial-fitting, do not tighten the screws at first; test whether the door opens and closes smoothly
The seal is poor and there is still a draft
Possible causes:
- The filament is too short and does not touch the floor
- The filament is too sparse
- The floor is uneven
- The installation position is wrong
Solutions:
- Check the trim length: the filament should touch the floor and be compressed by 2-3 mm
- Switch to a denser specification: a tuft density of at least 50%
- Adjust the installation position: move it down by 2-3 mm
- Uneven floor: add shims at the low spots, or switch to a longer filament
Prevention:
- When measuring the door gap, measure the largest value (the lowest point of the floor)
- Choose a specification with a tuft density of 60-70%
- Check whether the floor is level
A self-adhesive strip brush comes off easily
Possible causes:
- The installation surface was not cleaned properly
- The temperature was too low during installation
- The surface is rough or damp
- The adhesive backing is of poor quality
Solutions:
- Clean and stick again: clean with alcohol and stick again once completely dry
- Warm the adhesive backing: warm it with a hair dryer to improve adhesion
- Reinforce it: apply strong glue or two-part epoxy at both ends
- Switch to the screw-fixed type: if it comes off often, screw fixing is recommended
Prevention:
- Clean the surface properly before installation (degrease, remove dust, dry)
- Install when the temperature is above 20°C (adhesion is better)
- Keep it under pressure for 24 hours
- Choose a brand of better quality
Strip brush maintenance and when to replace
Correct maintenance extends service life.
Routine maintenance
Weekly:
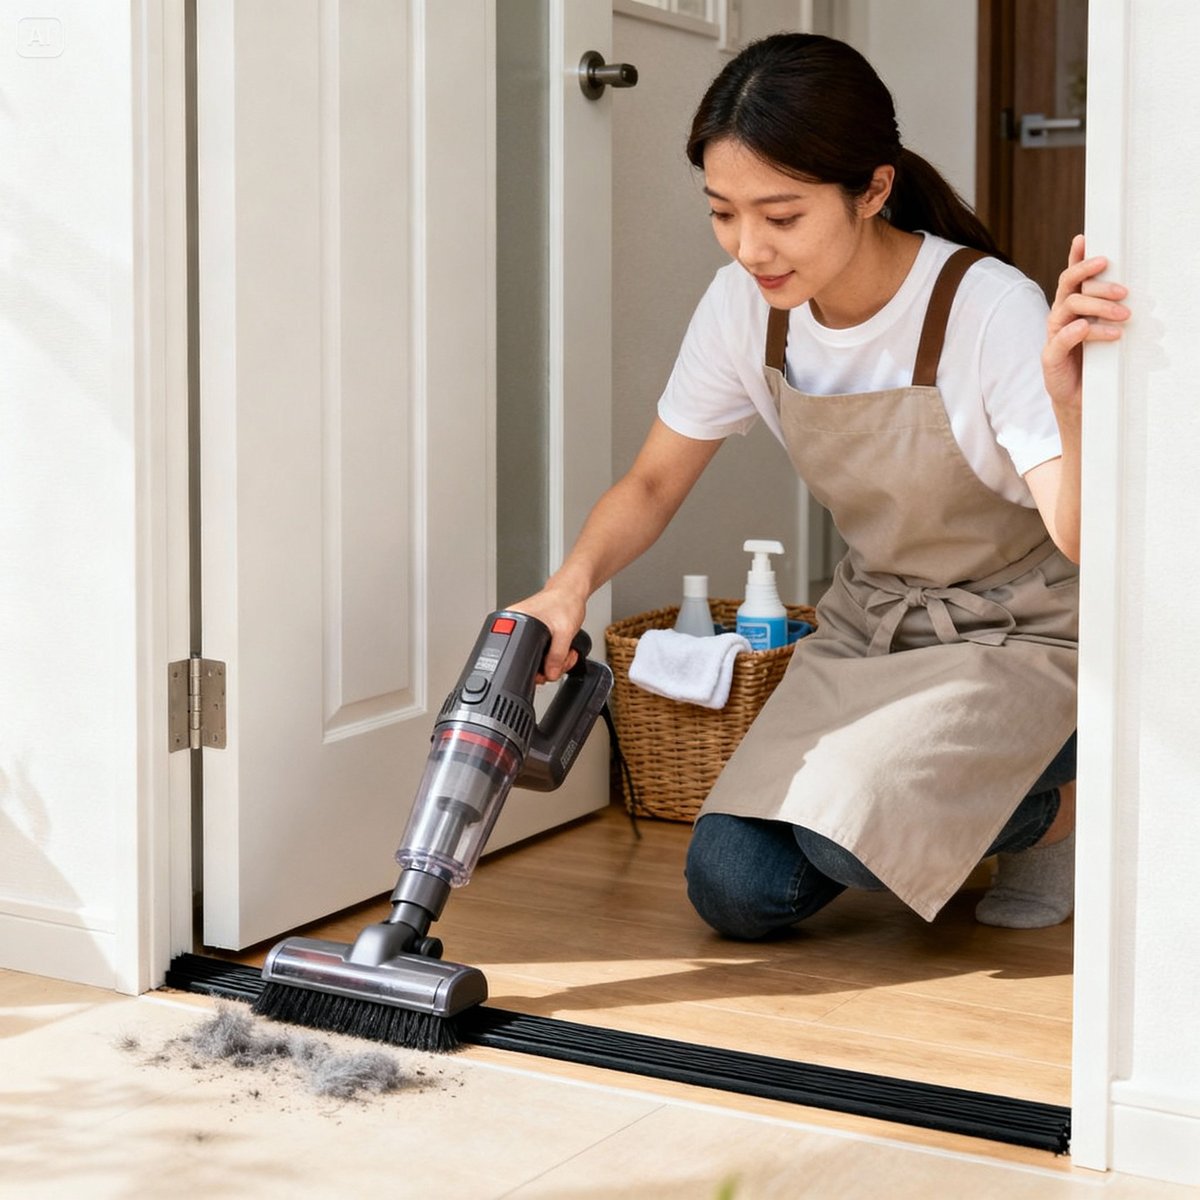
- Remove dust from the filament with a vacuum cleaner
- Check whether the fixing screws have loosened
Monthly:
- Wipe the filament with a damp cloth
- Check whether the filament is deformed or coming out
- Check whether the base is deformed
Quarterly:
- Deep-clean the filament (a cleaner can be used)
- Check the seal
- Adjust the height if necessary
Judging when to replace
Situations in which it must be replaced:
- Heavy filament loss (> 30%)
- The filament is deformed and has lost its resilience
- The base is deformed or broken
- The screw holes are damaged
- The seal has clearly deteriorated
Recommended replacement cycle:
- PP filament: 2-3 years
- Nylon filament: 3-5 years
- Horsehair: 5 years or more
- Heavy use (opened and closed more than 20 times a day): shorten by 30-50%
Tips for a longer service life
- Avoid opening and closing the door with excessive force (it reduces filament wear)
- Clean regularly (to stop dust from hardening)
- Avoid long periods of damp (the brush goes moldy and deforms easily)
- Choose a better-quality material (nylon is better than PP)
Need to replace strip brushes or buy in volume? See the YC Brushes product catalog. Large orders receive a discount.
Conclusion: the right strip brush solves a big problem for little money
A strip brush does not cost much.
Yet it can solve:
- Drafts through the door gap (saving on electricity)
- Dust getting in (less cleaning)
- Noise (sound insulation)
- Insects getting in (a cleaner environment)
Three keys to buying
1. Measure the size correctly
- Door gap
- Door leaf width
- Installation space
2. Choose the right specification
- Choose the base material by where it will be used
- Choose the filament material by budget
- Choose the fixing method by installation conditions
3. Install it correctly
- Screw-fixed is the most secure
- Self-adhesive is the simplest
- Follow the steps carefully
The advantages of YC Brushes strip brushes
Custom service
- Any length made to order
- Development of special specifications
- Free advice on specifications
Quality assurance
- Over 40 years of manufacturing experience
- Filament imported from Germany
- Aluminum alloy base that does not deform easily
Favorable prices
- Volume discounts (20% off, or 80% of list price, for 100 pieces or more)
- Factory-direct prices
- Better terms for long-term cooperation
See the full strip brush specifications now, or contact YC Brushes for free buying advice and a quote.
Want to learn more specialist knowledge about brushes? Go to the blog to explore more articles.