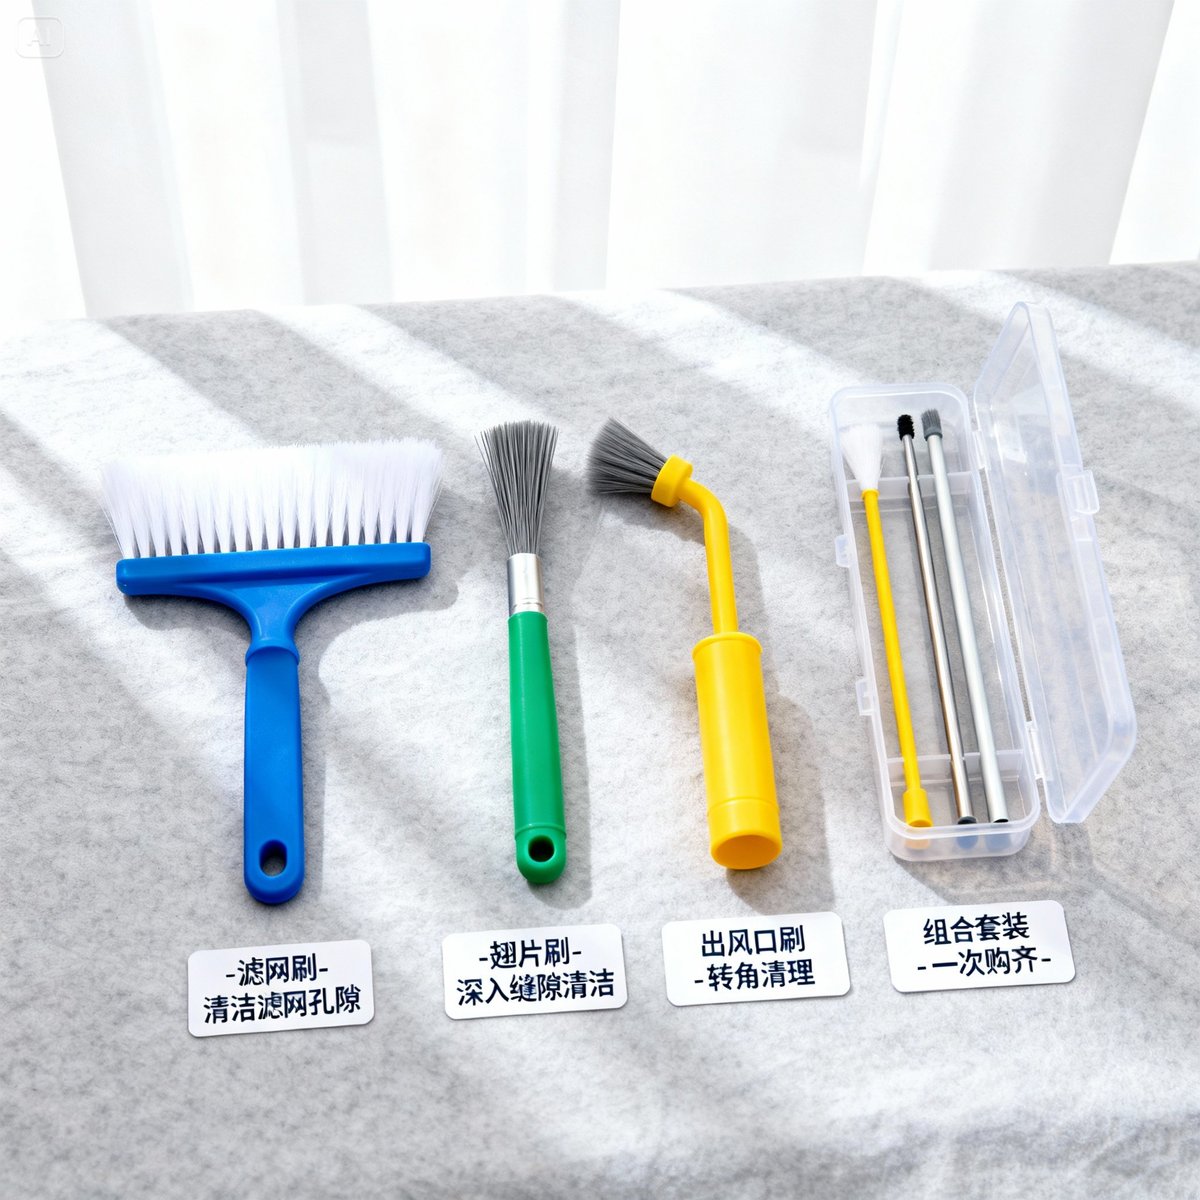
How long has it been since you cleaned your keyboard? The dust, food crumbs and skin flakes that build up in the gaps between the keys not only affect how typing feels, they can also make keys stop working. A dedicated keyboard cleaning brush reaches into the gaps between the keys and removes the dirt effectively. This article covers the types of keyboard cleaning brush, recommended brands, where to buy and a step-by-step cleaning tutorial, so your keyboard looks like new again. (This article was written for readers in Taiwan: the stores and shopping sites it mentions describe the Taiwan market. "3C" is the Taiwanese term for computers, communications and consumer electronics.)
Why do you need a dedicated keyboard cleaning brush?
Common dirt on a keyboard
Common types of dirt:
- Dust and lint: dust in the air and clothing fibers that accumulate
- Food crumbs: crumbs dropped while snacking at work
- Skin flakes and oil: flakes and oil left behind by your fingers
- Hair and pet hair: human hair and pet fur
Health risks:
- A build-up of bacteria may trigger skin allergies
- Mold spores may cause respiratory problems
- Long contact with a dirty keyboard raises the risk of catching a cold
The limits of ordinary tools
Why are a cloth and a vacuum cleaner not enough?
| Tool | Problem |
|---|---|
| Cloth | Cannot reach into the gaps between keys |
| Vacuum cleaner | Not enough suction; cannot reach small gaps |
| Adhesive tape | Limited stickiness; only picks up surface dust |
| Compressed air can | Only blows dust away; cannot remove oily dirt |
Advantages of a dedicated keyboard cleaning brush:
- ✅ Fine, soft bristles reach into the gaps between keys (0.5-1 mm)
- ✅ Does not damage the coating on the key surface
- ✅ Used with an air blower, it cleans more thoroughly
- ✅ Reusable, so it is environmentally friendly and saves money
Types of keyboard cleaning brush
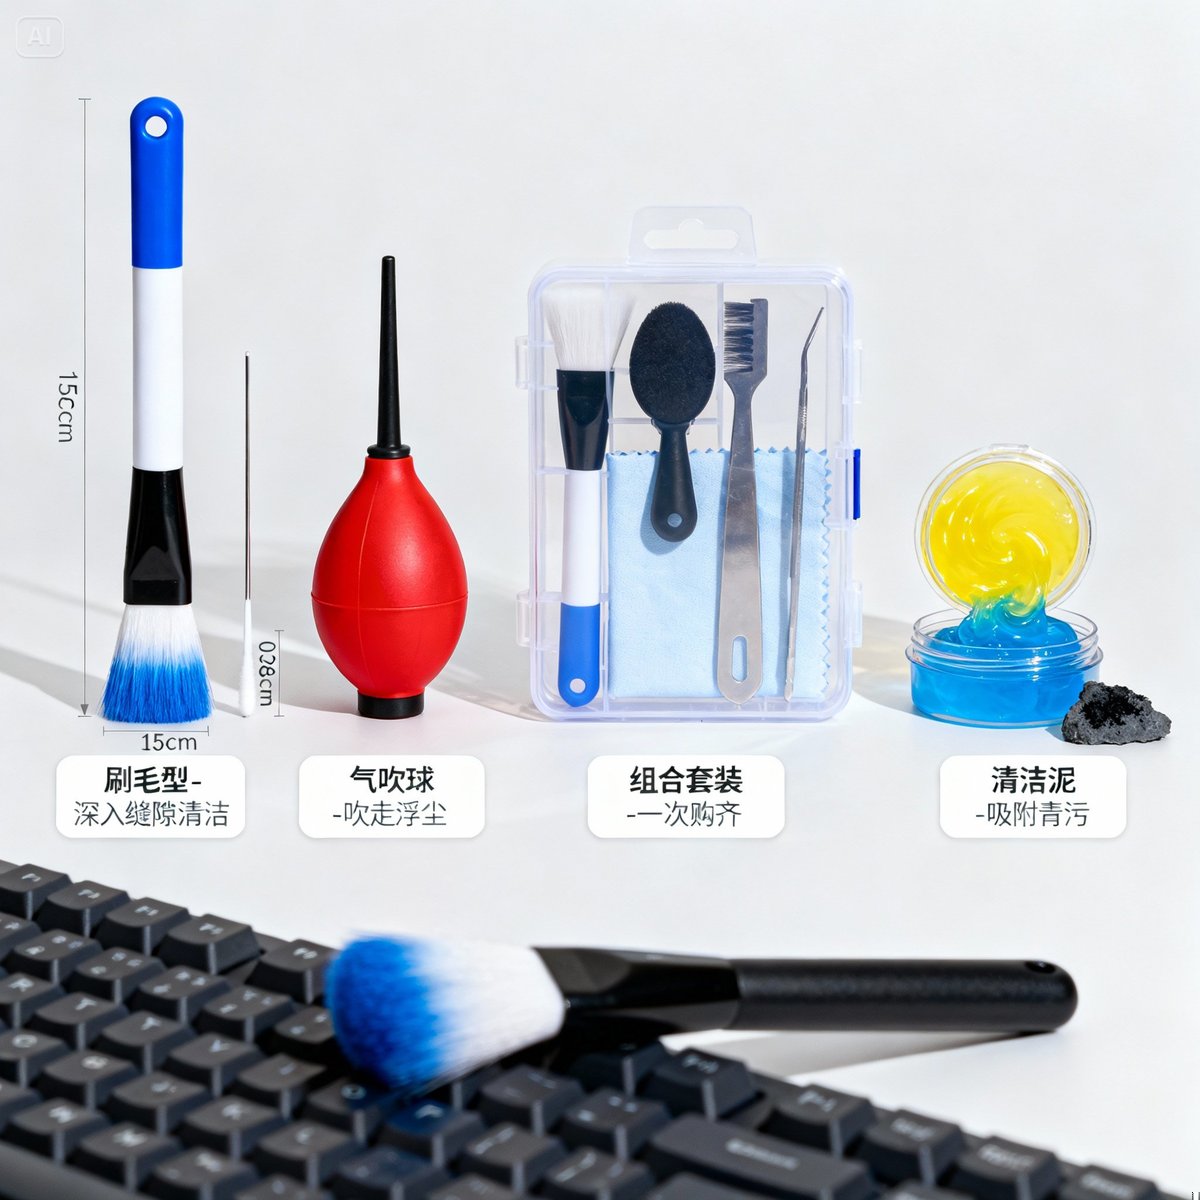
1. Bristle cleaning brush | Essential for reaching into gaps
Design features:
- Fine, soft bristles (usually 0.3-0.5 mm thick)
- Brush head 1-2 cm wide, suited to keyboard gaps
- Bristles 1-2 cm long, able to reach under the keys
Suitable for cleaning:
- Dust in the gaps between keys
- The grooves of the keyboard frame
- The base of a mechanical keyboard after the keycaps are removed
Material options:
- Nylon filament: tough, suited to ordinary keyboards
- Hog bristle: a natural material, anti-static, suited to precision electronics
- Silicone bristles: soft and gentle on keycaps, suited to premium keyboards
Recommended brands:
- ELECOM keyboard cleaning brush: a Japanese 3C accessory brand, mid-price range
- Daiso keyboard brush: a basic model, suited to those on a limited budget, budget range
- MUJI cleaning brush: simple design, soft bristles, mid-price range (Actual prices are whatever each retailer lists)
2. Air blower tools | Blow away loose dust
Design features:
- A silicone bulb design
- Squeezing it produces a strong jet of air
- Reusable and environmentally friendly
Suitable for cleaning:
- Loose dust in keyboard gaps
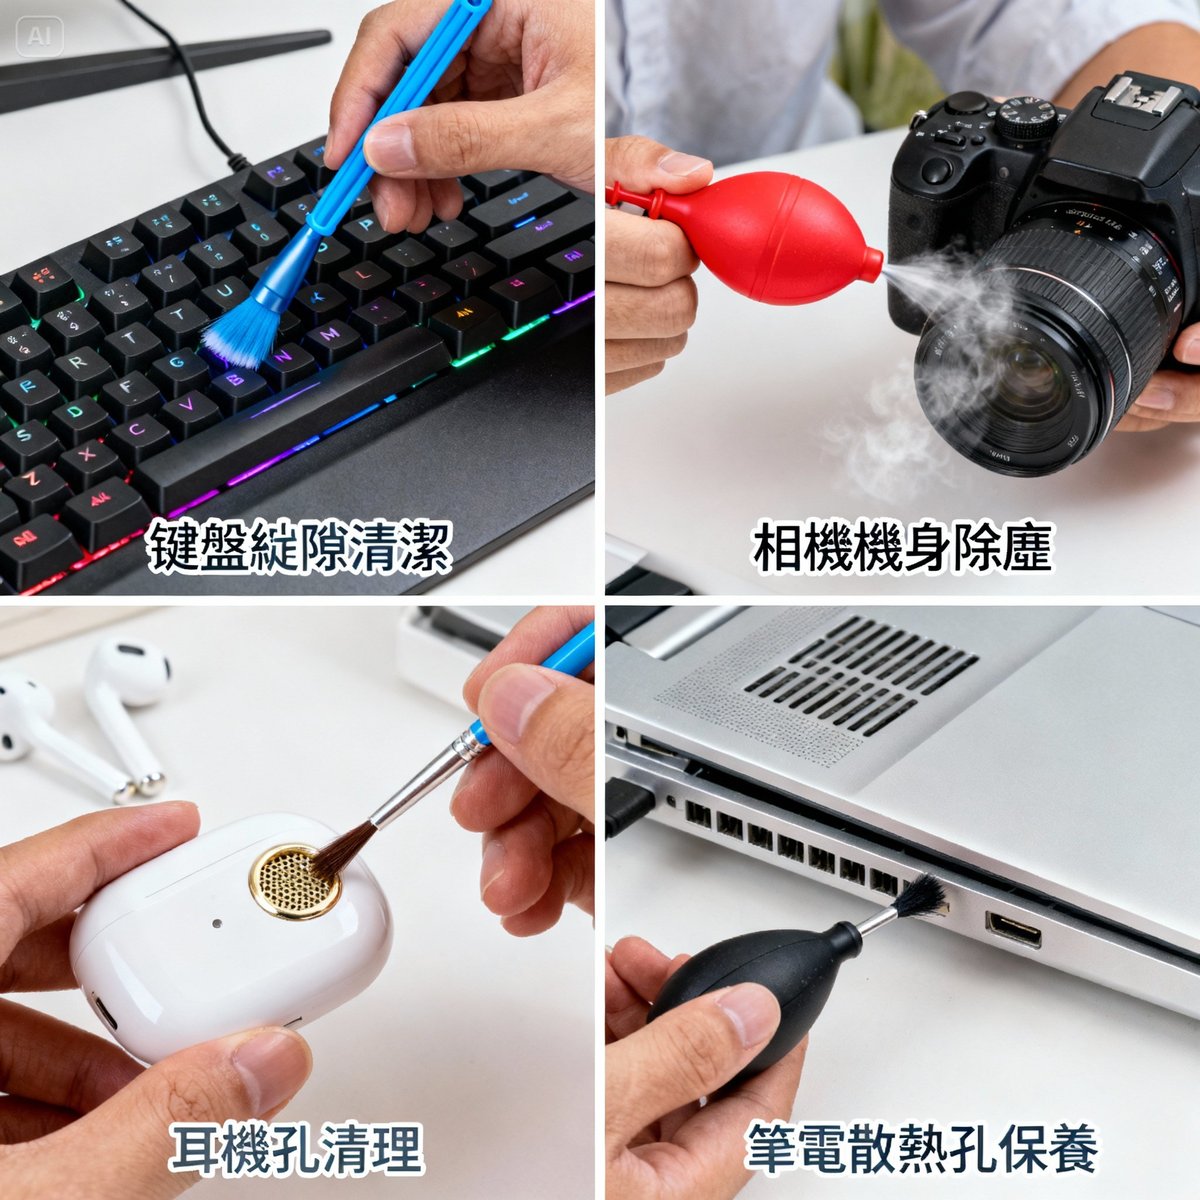
- Laptop cooling vents
- Dust around a camera lens
Pros and cons:
Pros:
- ✅ No contact with the keys, so no risk of scratching
- ✅ Reusable, more environmentally friendly than compressed air cans
- ✅ Easy to carry and ready to use at any time
Cons:
- ❌ Only blows dust away; cannot remove oily dirt
- ❌ The airflow is weaker, so it has limited effect on heavy dirt
- ❌ Has to be used together with a brush to clean thoroughly
Recommended brands:
- VSGO professional air blower: a camera-grade blower with strong airflow, mid-to-high price range
- JJC air blower: good value for money, mid-price range
- Ordinary air blower: enough for general use, budget range (Actual prices are whatever each retailer lists)
3. Multi-tool kits | Buy everything at once
A standard kit contains:
- Large brush × 1 (for the keyboard surface)
- Small brush × 1 (for reaching into gaps)
- Air blower × 1 (for blowing dust away)
- Keycap puller × 1 (for mechanical keyboards, optional)
- Cleaning gel × 1 (picks up dust, optional)
- Microfiber cloth × 1 (for wiping the screen)
Who it suits:
- Beginners buying keyboard cleaning tools for the first time
- Users who need to clean several computers regularly
- Group purchases for offices and studios
Recommended kits:
Entry-level kit (budget to mid-price range):
- Large brush + small brush + air blower + cleaning cloth
- Brands: various budget cleaning kits, ELECOM entry-level models
Advanced kit (mid-to-high price range):
- Double-ended brush + air blower + keycap puller + cleaning gel + cleaning fluid + storage case
- Brands: ELECOM, JJC professional models
Professional kit (high price range):
- Several brush heads + powerful air blower + metal keycap puller + professional cleaning fluid + storage pouch
- Brands: VSGO, Lenspen camera-grade tools (Actual prices are whatever each retailer lists)
4. Cleaning gel (Cyber Clean) | A new way to clean
Design features:
- A jelly-like, putty texture
- Pressed onto the keyboard, it picks up dust and crumbs
- Can be reused 50-100 times
How to use it:
- Knead the cleaning gel into a ball
- Press it lightly onto the keyboard surface and into the gaps
- Lift it slowly; the dirt sticks to the gel
- Repeat several times until the keyboard is clean
Pros:
- ✅ Fun to use; cleaning feels like playing with clay
- ✅ Gets into complicated gaps
- ✅ Needs no force; a gentle way to clean
Cons:
- ❌ Cannot remove stubborn oily dirt
- ❌ Can only be used a limited number of times and must be replaced regularly
- ❌ The unit price is on the high side; actual prices are whatever the retailer lists
Recommended brands:
- Cyber Clean: the original brand, mid-to-high price range
- ColorCoral cleaning gel: mid-price range (Actual prices are whatever each retailer lists)
Common keyboard cleaning brush brands
1. ELECOM keyboard cleaning brush | A Japanese 3C accessory brand
Price band: mid-price range (actual prices are whatever the retailer lists)
Product features:
- A Japanese 3C accessory brand that has made a 2WAY keyboard cleaning brush combining a brush and a wiping cloth (KBR-017AS, listed as discontinued on the official website)
- Current models and specifications are whatever each retailer lists
Suitable keyboards:
- Mechanical keyboards
- Membrane keyboards
- Laptop keyboards
2. Budget keyboard cleaning kit | A brush and an air blower in one purchase
Price band: budget to mid-price range (actual prices are whatever the retailer lists)
What to look for:
- Check that the kit contains at least a brush and an air blower
- Choose soft bristles, which are less likely to damage the keycap coating
- A storage pouch makes it easier to carry
3. Daiso keyboard cleaning brush | First choice for buyers on a tight budget
Price band: budget range (actual prices are whatever the store lists)
Product features:
- Very cheap; buy it and use it right away
- All the basic functions
- Available at every Daiso store across Taiwan
Pros and cons:
Pros:
- ✅ A very affordable price
- ✅ Easy to buy
- ✅ Enough for basic cleaning needs
Cons:
- ❌ The bristles are stiffer and not suited to premium keyboards
- ❌ Average durability (needs replacing after about half a year)
- ❌ No accessories such as an air blower
4. MUJI cleaning brush | Minimalist looks
Price band: mid-price range (actual prices are whatever the retailer lists)
Product features:
- A minimalist design with a quality feel
- Soft bristles suited to all kinds of keyboards
- A comfortable handle of moderate length
Who it suits:
- Users who care about looks
- People who like the MUJI style
- Those willing to pay for design
💡 Does your office or internet cafe need to buy keyboard cleaning tools in bulk?
Contact YC Brushes now. We offer custom cleaning brush solutions and wholesale prices, and with over 40 years of manufacturing experience we can design the brush that best fits your needs.
Other uses for 3C cleaning brushes
A keyboard cleaning brush is not only for keyboards. It can be used on all kinds of electronic devices:
1. Screen cleaning
Suitable for:
- The grooves of a computer screen frame
- The joint between a laptop screen and its keyboard
- The gaps in a monitor stand
How to use it:
- Brush the frame grooves lightly with the small brush
- Wipe the screen surface with a microfiber cloth
- Take care not to let the bristles touch the screen panel directly
2. Camera cleaning
Suitable for:
- Gaps in the camera body
- Dust around the lens
- The flash area
How to use it:
- Clean with very soft bristles (a brush made for cameras is recommended)
- Use an air blower to blow dust off the lens surface
- Avoid touching the lens glass directly
Note:
- ⚠️ Do not clean the inside of the lens yourself; take it to a professional shop
- ⚠️ The bristles must be kept dry and clean to avoid scratching the lens
For deeper cleaning of electronic equipment, see Electric cleaning brush recommendations 2026 to learn about professional-grade cleaning tools.
3. Earphone cleaning
Suitable for:
- The mesh filter over the earphone opening
- The adjustment gaps of over-ear headphones
- The earphone cable connector
How to use it:
- Brush the mesh filter lightly with the small brush
- Blow the dust out of the earphone opening with an air blower
- Wipe the earphone housing with a soft cloth dampened with alcohol
4. Mouse and touchpad
Suitable for:
- The gaps around mouse buttons
- The groove of the mouse scroll wheel
- The edges of a laptop touchpad
How to use it:
- Clean the scroll wheel groove with the small brush
- Blow the dust out of the button gaps with an air blower
- Use cleaning gel to pick up dirt on the touchpad surface
5. Other electronic devices
- Phone charging port: blow out lint with an air blower
- Game console cooling vents: a brush and air blower together
- Router cooling vents: remove dust with a brush
- USB ports: blow out dust with an air blower
Keyboard cleaning step by step
Preparation
Tools you need:
- Keyboard cleaning brush (bristle brush + air blower)
- Microfiber cloth
- 75% alcohol or keyboard cleaning fluid
- Keycap puller (for mechanical keyboards, optional)
Recommended cleaning frequency:
- Everyday use: a quick clean once a week
- Deep clean: once a month
- Mechanical keyboard cleaning with keycaps removed: every 3-6 months
Step 1: Shut down and disconnect the power
Why shut down?
- Avoids triggering commands by pressing keys accidentally
- Prevents a short circuit if cleaning fluid seeps in
- Makes cleaning safer
How to do it:
- Desktop computer: shut down and unplug the keyboard's USB cable
- Laptop: shut down and unplug the power cord
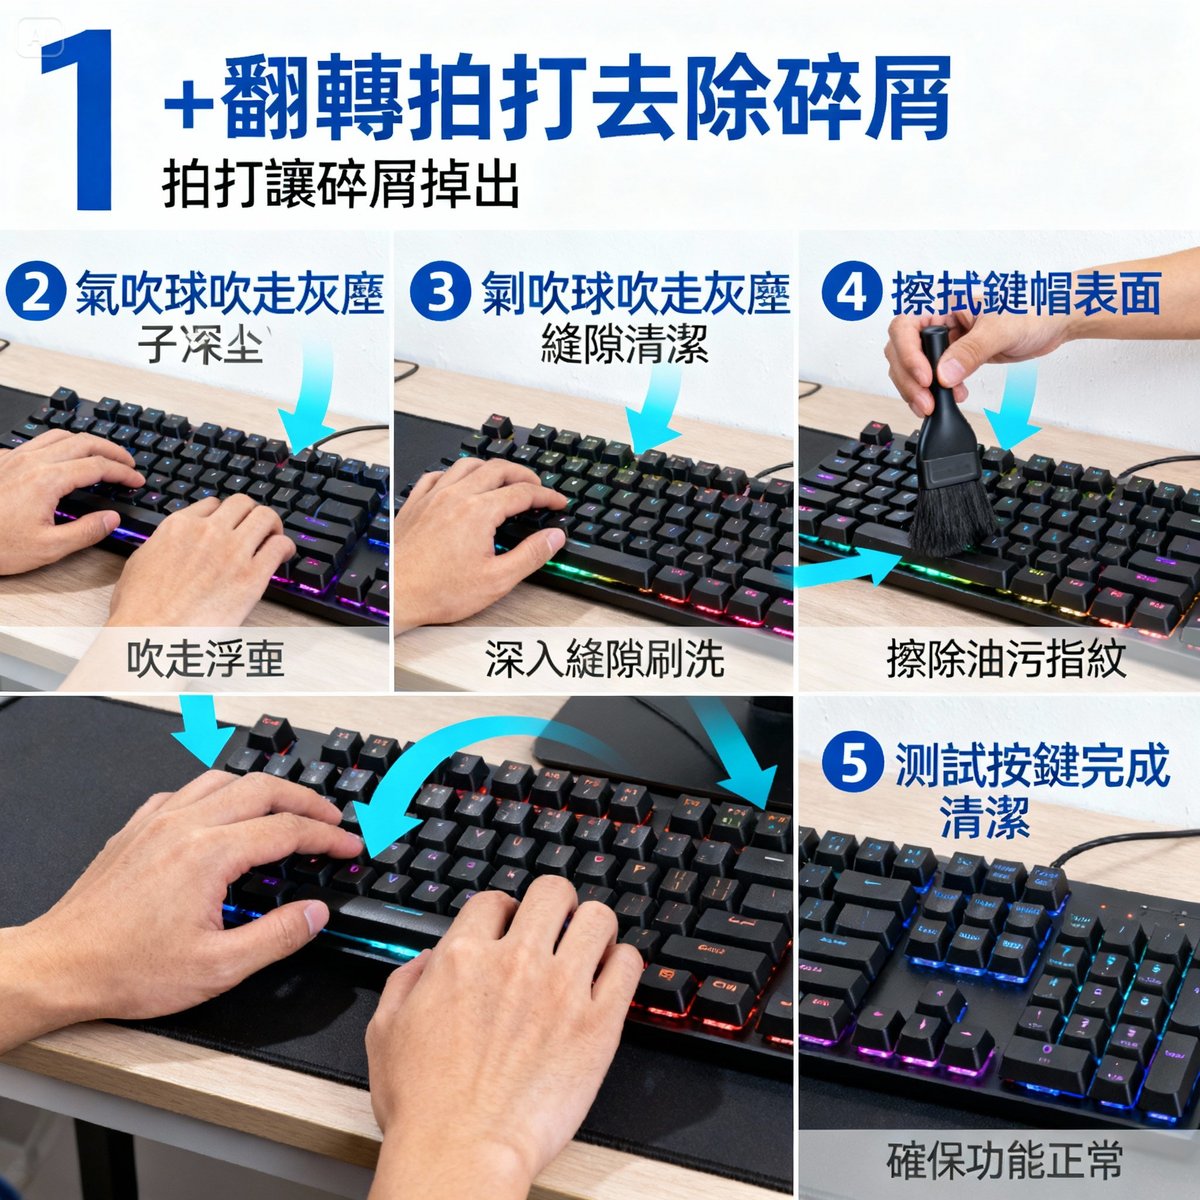
Step 2: Flip and tap (to remove large debris)
How to do it:
- Turn the keyboard over 180 degrees (keys facing down)
- Tap the back of the keyboard gently
- Shake the keyboard so the crumbs fall out
- Repeat 3-5 times
Points to note:
- ⚠️ Tap gently to avoid damaging the internal structure
- ⚠️ Excessive tapping is not recommended for laptops
- ✅ Work over a trash can or a sheet of newspaper to keep the desk clean
Step 3: Blow away the dust with an air blower
How to do it:
- Turn the keyboard face up again
- Aim the air blower at the gaps between the keys
- Squeeze the blower firmly to blow the dust away
- Clean row by row, in order
- Pay special attention to the area around large keys such as the space bar and Enter
Tips:
- Blowing at an angle works better (about 45 degrees)
- After blowing, you can flip and tap again so the loosened dust falls out
Step 4: Brush the gaps
How to do it:
- Brush the keyboard surface lightly with the large brush
- Reach into the gaps between the keys with the small brush
- Brush along the rows of the keyboard (not at random)
- Blow away the dust you brush out with the air blower, or wipe it off with a cloth
Brushing tips:
- Hold the bristles at a 45-degree angle to the keyboard
- Several light strokes are more effective than one hard stroke
- Blow or wipe each area as soon as you finish brushing it, so the dust does not spread
Step 5: Wipe the keycap surfaces
How to do it:
- Dampen a microfiber cloth with a small amount of alcohol (or keyboard cleaning fluid)
- Wipe the surface of each keycap
- Pay special attention to frequently used keys (W, A, S, D, space bar, Enter)
- Wipe the keyboard frame and base
Points to note:
- ⚠️ Do not spray too much liquid, so that it does not seep into the keyboard
- ⚠️ The cloth should be only slightly damp, never dripping wet
- ✅ Wipe once more with a separate dry cloth to make sure everything is dry
Step 6: Deep cleaning a mechanical keyboard (optional)
Who it is for: mechanical keyboard users, once every 3-6 months
How to do it:
- Remove all the keycaps with a keycap puller (remember to take a photo to record their positions)
- Soak the keycaps in warm soapy water for 10-15 minutes
- Scrub the keycaps with a brush
- Rinse them clean and let them air dry (at least 4 hours)
- Clean the keyboard base and the switches with the small brush
- Blow the dust off the base with the air blower
- Put the keycaps back once you are sure they are completely dry
Keycap pulling tips:
- Pull straight up with the keycap puller; do not rock it from side to side
- Large keys (space bar, Shift, Enter) have stabilizers, so take care when pulling them
- Take a photo of the key layout first so you do not mix the keys up when putting them back
Step 7: Final check
Checklist:
- All key surfaces are clean and free of dirt
- No visible dust in the gaps
- The keyboard is completely dry
- All keycaps removed for cleaning have been put back
- Key test shows everything works normally
Where to buy a keyboard cleaning brush? Stores and price comparison
The stores and shopping sites below are those available in Taiwan.
Physical stores
Electronics malls:
- Guang Hua Digital Plaza, NOVA (electronics malls in Taiwan): a full range of brands that you can compare on the spot
- Price band: everything from budget to high-priced
- Pros: you can handle and try the products, and ask specialist staff for advice
- Cons: prices may be higher
Household goods stores:
- Daiso: the best value for money, budget range
- HOLA, IKEA: better design, mid-price range
- MUJI: a quality feel, mid-price range
- Pros: easy to buy, with many locations across Taiwan
- Cons: fewer choices, less specialized
Stationery stores:
- Jin Yu Tang, 9x9 Stationery (Taiwanese stationery chains): budget to mid-price range
- Pros: found in most neighborhoods, easy to buy
- Cons: limited choice of brands
Online channels
General e-commerce sites:
- momo, PChome, Shopee, Yahoo
- Price band: everything from budget to high-priced, covering all kinds of brands
- Pros:
- ✅ The widest selection, with every brand available
- ✅ Fierce price competition and frequent promotions
- ✅ You can read reviews and see what other buyers think
- ✅ Home delivery, which is convenient
- Cons:
- ❌ You cannot handle the product
- ❌ You have to wait for delivery
Brand official websites:
- ELECOM, VSGO and others
- Pros: assured quality and a full warranty
- Cons: higher prices, no discounts
Taobao, AliExpress:
- Price band: the cheapest of all the channels (the exchange rate has to be factored in)
- Pros: very cheap, with a wide selection
- Cons: a wait of 1-3 weeks, and uneven quality
Price comparison table
| Where to buy | Entry-level | Mid-range | High-end | Delivery |
|---|---|---|---|---|
| Daiso | Budget | Budget | - | Pick up in store |
| Electronics malls | Budget | Mid-price | High-price | Pick up in store |
| momo/PChome | Budget | Mid-price | High-price | Home delivery in 1-3 days |
| Shopee/Ruten | Budget | Mid-price | High-price | Home delivery in 2-5 days |
| Brand official websites | Mid-price | Mid-to-high price | High-price | Home delivery in 3-5 days |
| Taobao | Budget | Budget | Mid-price | Sea freight in 1-3 weeks |
(The above shows relative positioning for reference only; actual prices are whatever each retailer lists)
Buying advice
Beginners:
- Recommended: a Daiso budget model or a budget keyboard cleaning kit
- Reason: a cheap way to test the waters, and enough for basic needs
Serious cleaning:
- Recommended: a keyboard brush from a brand such as ELECOM + an air blower
- Reason: stable quality and good cleaning results
Enthusiasts:
- Recommended: the VSGO professional kit
- Reason: a complete set of tools, suited to enthusiasts who collect several keyboards (Actual prices are whatever each retailer lists)
Office purchasing:
- Recommended: a budget cleaning kit or Daiso, and negotiate a discount for buying in bulk
- Quantity: 1 kit for every 2-3 people is enough
FAQ
Can a toothbrush be used instead of a keyboard cleaning brush?
Yes, but it is not recommended for long-term use.
Problems with an old toothbrush:
- The bristles are too stiff and may scratch the keycap coating
- The head is too wide to reach into narrow gaps
- The bristles are shorter, so the cleaning effect is limited
When it is suitable:
- In an emergency (you forgot to bring your cleaning brush)
- Cleaning the keyboard base (which can be scrubbed hard)
- On an extremely limited budget
The right approach:
- If you do use a toothbrush, choose a "soft bristle" one
- Use it only in an emergency
- For long-term cleaning a dedicated brush is still recommended (a budget model is all you need)
Is cleaning gel really any good? Will it stick to the keyboard?
In normal use it does not stick, but pay attention to quality and to how you use it.
Advantages of cleaning gel:
- Fun to use, and the cleaning process is relaxing
- Gets into complicated gaps
- Gentle, and does not damage the keyboard
Points to note in use:
- ✅ Choose a reputable brand (Cyber Clean, ColorCoral)
- ✅ Avoid poor-quality products of unknown origin (they stick or leave residue)
- ✅ Do not press too hard; a light press is enough
- ✅ Lift it slowly; do not rip it off quickly
- ⚠️ If the cleaning gel is too dirty (it has turned dark gray or black), replace it with a new one
When it does stick:
- Poor-quality cleaning gel (bad material)
- The keyboard surface is too hot (the computer has just been used and the keyboard is warm)
- It was pressed down hard for too long
Can laptop keycaps be removed for cleaning?
In most cases it is not recommended, unless it is a specially designed laptop with mechanical switches.
Why it is not recommended:
- Most laptop keyboards use a scissor-switch structure, which is easily damaged when a keycap is pulled
- The connection between the keycap and the base is fragile, and a keycap that is pulled may not go back on
- Repairs are expensive (the whole keyboard assembly is replaced)
The right way to clean a laptop keyboard:
- Turn it over and tap lightly to remove crumbs
- Blow away the dust with an air blower
- Brush the gaps lightly with the small brush
- Wipe the keycap surfaces with a damp cloth
- Do not pull the keycaps!
Laptops whose keycaps can be removed:
- Some gaming laptops (such as high-end MSI and ASUS ROG models)
- Laptops with mechanical switches
- Models whose manual clearly states that the keycaps can be removed
How to tell:
- Check the manual on the official website
- Search for whether there is a keycap removal tutorial for that model
- If you are not sure, do not take the risk
Can I use a vacuum cleaner on a keyboard?
Yes, but pay attention to the suction and to how you do it.
Points to note when using a vacuum cleaner:
- ✅ Choose the low-suction mode or a handheld vacuum cleaner
- ✅ Use the vacuum's brush attachment (not the bare nozzle)
- ✅ Keep a distance of 2-3 cm; do not press it against the keyboard
- ⚠️ A vacuum cleaner is not recommended for mechanical keyboards (it may suck the keycaps off)
- ⚠️ Not recommended for laptop keyboards (the suction may damage the scissor-switch structure)
Vacuum cleaner vs air blower:
| Tool | Pros | Cons | Suitable for |
|---|---|---|---|
| Vacuum cleaner | Quickly removes a lot of dust | May suck keycaps off; noisy | External keyboards |
| Air blower | Gentle, controllable, safe | Needs many puffs; takes longer | All keyboards |
Advice:
- External membrane keyboards: a vacuum cleaner can be used (low suction)
- Mechanical keyboards and laptop keyboards: an air blower is safer
How often should a keyboard be cleaned?
It depends on the environment and how often the keyboard is used.
Ordinary users (office work, browsing):
- Quick clean: once a week (air blower + a simple wipe)
- Deep clean: once a month (brushing + wiping with alcohol)
- Cleaning with keycaps removed: once every half year (mechanical keyboards only)
Heavy users (engineers, designers, gamers):
- Quick clean: once every 3 days
- Deep clean: once every 2 weeks
- Cleaning with keycaps removed: once every 3 months
Special environments:
- Eating while using the computer: clean once every 2-3 days
- A keyboard shared by several people in an office: a quick clean every day
- Dusty environments (construction sites, warehouses): clean every 2-3 days
Signs that cleaning is needed:
- Visible dust in the gaps between keys
- Keys feel sticky or sluggish
- Keycap surfaces are greasy or show fingerprints
- There is an odor
Does a keyboard cleaning brush need to be washed?
Yes. Otherwise the more you clean, the dirtier things get.
How often:
- Wash it once after every 5-10 uses
- Or whenever dust is visibly trapped in the bristles
How to wash it:
- Rinse the bristles with clean water
- Work the bristles with your fingers so the dirt flows out
- A small amount of dish soap can be used to rub them clean
- Rinse thoroughly until there are no suds
- Shake off the excess water
- Air dry with the bristles facing down (4-8 hours)
Note:
- ⚠️ Make sure it is completely dry before use, otherwise the moisture will harm electronic devices
- ⚠️ An air blower does not need washing, but check the nozzle regularly for dust
Further reading: How often should brushes be washed? The complete guide to cleaning brushes
Further reading
Want to know more about cleaning brushes? We recommend:
- Gap cleaning brush recommendations | The secret weapon for small gaps and blind spots: keyboard gaps need dedicated tools too
- How often should brushes be washed? The complete guide to cleaning brushes: cleaning brushes need regular care as well
- The complete buying guide to cleaning brushes: more about cleaning brushes
Summary: clean your keyboard regularly for smoother typing
Keyboard cleaning is not only a matter of hygiene; it also affects the user experience and the life of the keyboard. A dedicated keyboard cleaning brush reaches into the gaps and removes dirt effectively:
- Choosing tools: beginners can start with a Daiso budget model or a budget keyboard cleaning kit
- Cleaning frequency: a quick clean every week, a deep clean every month
- The right steps: tap → air blower → brush → wipe
- Other uses: a keyboard brush can also clean cameras, earphones and other electronic devices
Start today and make regular keyboard cleaning a habit, so your keyboard always stays like new!
Need cleaning brushes in special specifications, or buying in bulk? YC Brushes offers a custom service backed by over 40 years of manufacturing experience you can rely on. Contact us now to learn more, or see the full product range.
Want to learn more about cleaning? Visit the blog to explore more specialist articles.