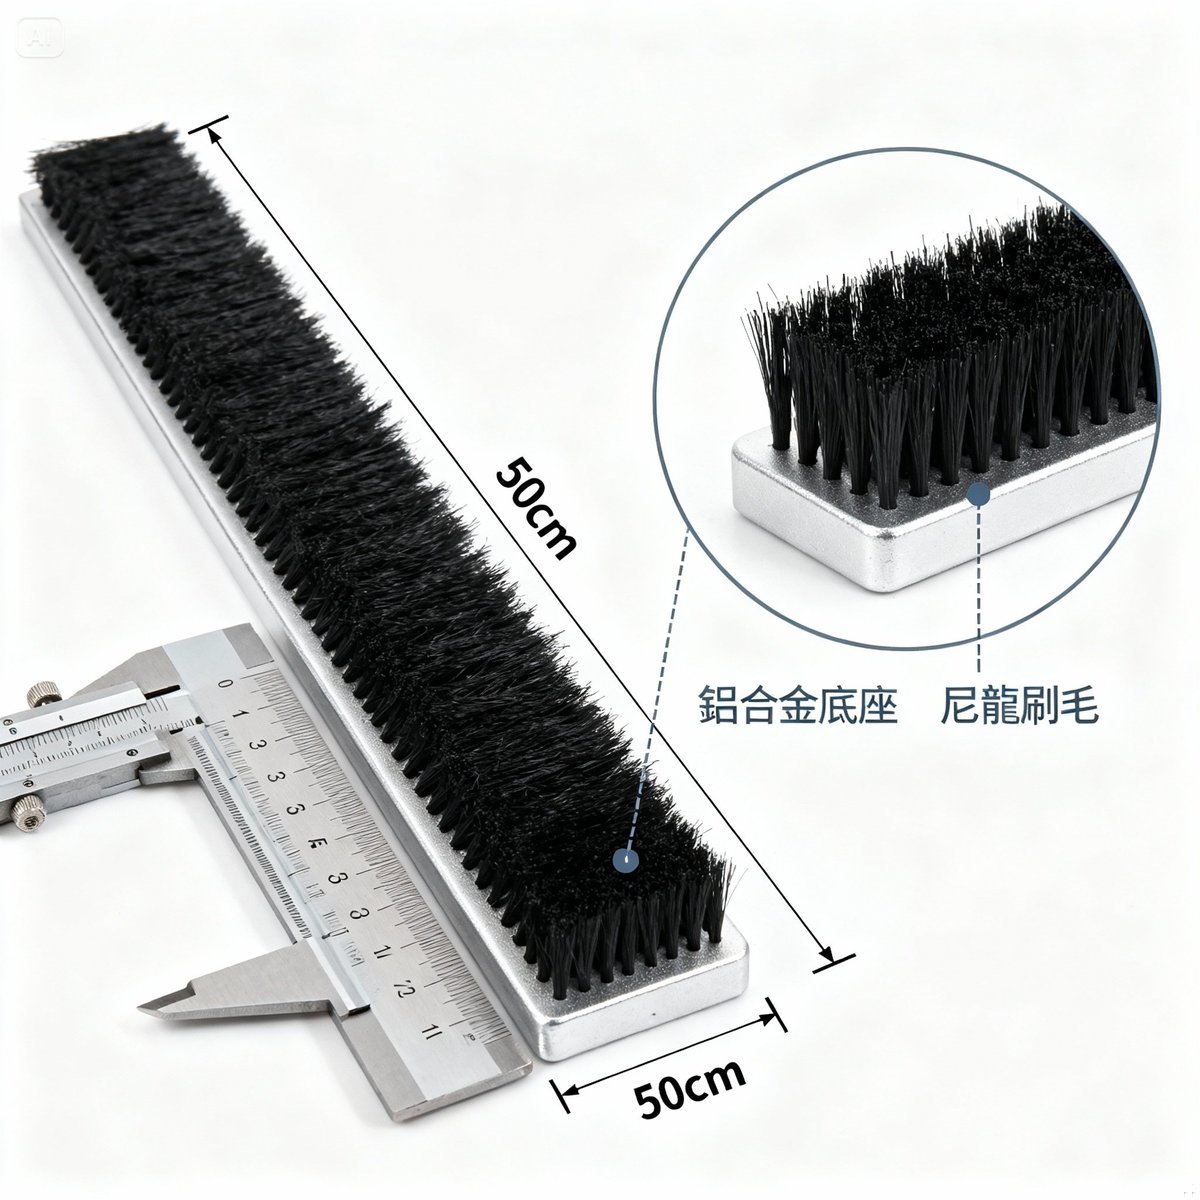
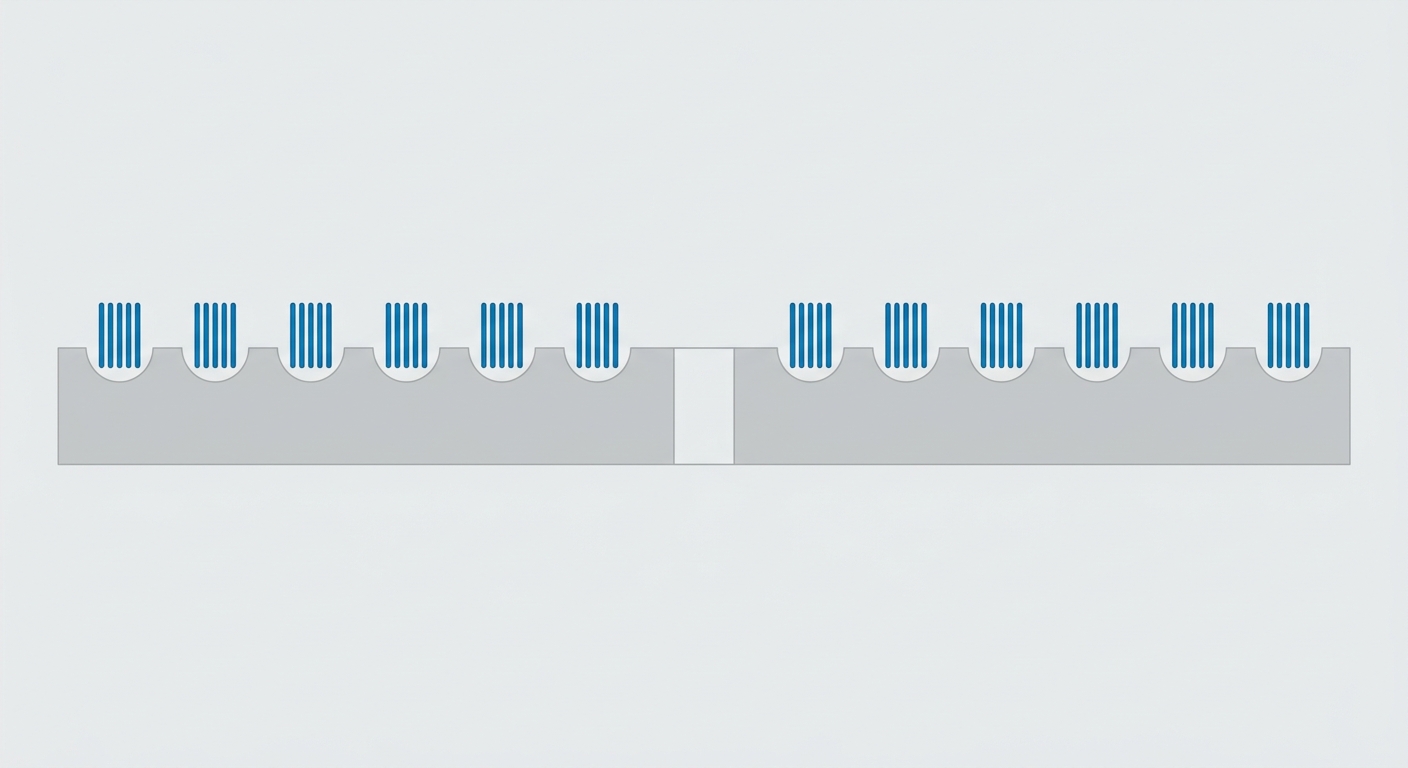
Have you ever seen wood grain boards in a furniture store, with a raised texture and a warm feel, and wondered "could I make that myself?" The answer is: absolutely! With wire brushing, ordinary wood can be turned into a high-quality textured wood grain board. But many woodworking beginners, on their first attempt, either brush too deep and damage the wood or brush too lightly and get no effect.
YC Brushes has over 40 years of manufacturing experience and supplies wire brushes for grain brushing to professional woodworking shops and DIY enthusiasts. This article explains the full process of making wire-brushed wood grain boards, the choice of brushes, brushing technique, wood selection and surface treatment, so that your first attempt can produce a professional-grade result.
Key point: the secret of wire-brushed wood grain is to "brush away the soft wood fibers and keep the hard grain". Choose the right wood, use the right brush and control the pressure, and you too can produce the rustic look of century-old timber.
What is wire-brushed wood grain? Principle and effect
The basic principle of wire-brushed wood grain
Wire-brushed wood grain is a wood surface treatment in which a wire brush removes the soft wood fibers (earlywood) on the surface and leaves the harder growth-ring grain (latewood), creating a raised, three-dimensional wood grain effect.
The science behind it: As a tree grows, growth is fast in spring and forms the looser "springwood" (also called earlywood); growth is slow in autumn and forms the denser "autumn wood" (also called latewood). The two differ greatly in hardness, so when a wire brush is moved along the grain:
- Soft wood fibers (earlywood): are brushed away by the wire, forming grooves
- Hard grain (latewood): resists the wire and stays raised
- Result: a wood surface that was flat takes on a three-dimensional growth-ring texture
5 effects and advantages of wire-brushed wood grain
- Three-dimensional texture: the grain goes from something you see to something you can feel
- Antique look: a natural weathered effect like century-old timber
- Slip resistance: the uneven surface increases friction (suited to floors and stairs)
- Better adhesion: paint or oil penetrates and bonds better when the wood is finished
- Higher value: compared with smooth boards, brushed boards generally sell for clearly more
Applications suited to wire-brushed wood grain
- Interior fit-out: ceilings, wall panels, partition panels
- Furniture making: tabletops, cabinet doors, headboards
- Flooring: solid wood flooring, wooden decking
- Outdoor structures: log cabin walls, terrace decking, fences
- Crafts: wood carvings, wooden frames, ornaments
- Commercial spaces: retro-style interiors for restaurants and cafes
💡 Market trend: brushed wood grain boards have been quite popular in recent years in Japanese, Scandinavian and industrial-style interior design, and that demand has also driven inquiries about the related brushes.
The 5 steps of wire-brushing wood grain
Wire-brushing wood grain looks simple, but every step has its key techniques. Below is the standard process compiled by YC Brushes.
Step 1: Preparing and choosing the wood
Choosing the right wood is the first step to success
Woods best suited to brushing (large difference between soft and hard grain):
| Wood species | Soft/hard difference | Brushing result | Recommendation | Market price |
|---|---|---|---|---|
| Pine | ★★★★★ | Excellent, deep grain | ⭐⭐⭐⭐⭐ | Low |
| Fir | ★★★★★ | Excellent, clear grain | ⭐⭐⭐⭐⭐ | Low |
| Japanese cedar | ★★★★☆ | Good, distinct grain | ⭐⭐⭐⭐ | Low to medium |
| Birch | ★★★☆☆ | Moderate, shallower grain | ⭐⭐⭐ | Medium |
| Beech | ★★☆☆☆ | Poor, needs hard brushing | ⭐⭐ | Medium to high |
| Oak | ★★★★☆ | Good, three-dimensional grain | ⭐⭐⭐⭐ | High |
| Walnut | ★★☆☆☆ | Poor, high hardness | ⭐⭐ | High |
Woods not suited to brushing:
- ❌ Plywood, MDF: no natural growth-ring grain
- ❌ Maple, cherry: uniform hardness, little soft/hard difference
- ❌ Red sandalwood, rosewood: extremely hard, difficult to brush away
- ❌ Bamboo: a different fiber structure, poor brushing result
🌲 Recommended for beginners: for a first attempt at grain brushing, use pine or fir. Both are inexpensive and give excellent results, so a failure does not hurt.
Pre-treating the wood
-
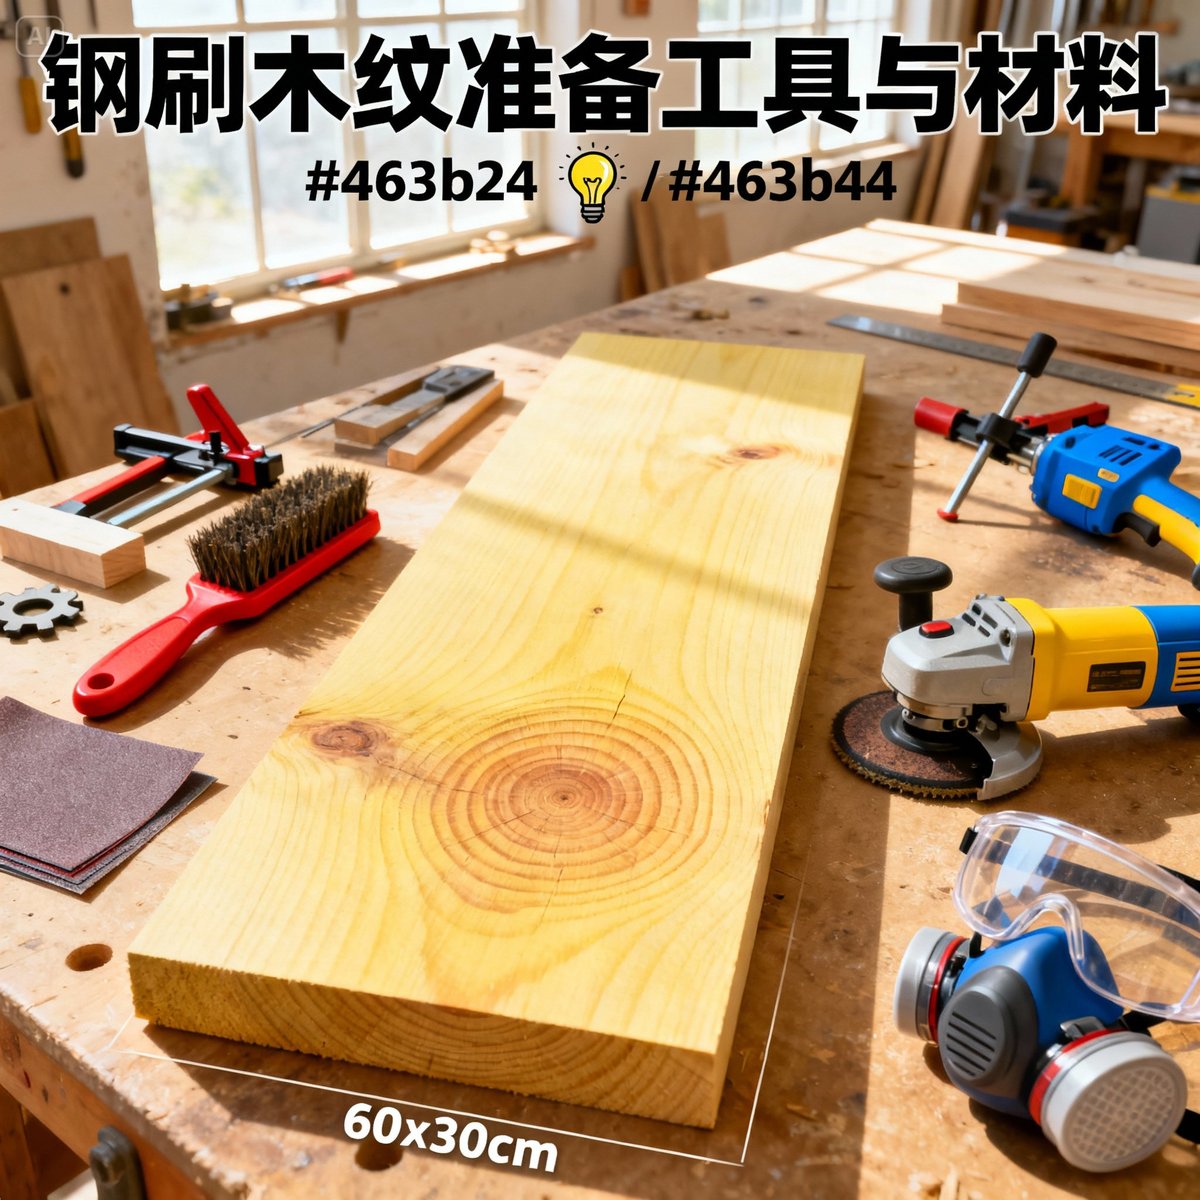
Choose unfinished boards: raw wood boards with no coating (at least 1.5 cm thick)
-
Sand the surface: sand the wood surface flat with 120-grit sandpaper (removing burrs and dirt)
-
Check the moisture content: the moisture content of the wood should be 8-12% (measured with a moisture meter)
- Moisture content too high: the wood fibers tangle during brushing and are hard to remove
- Moisture content too low: the wood is too brittle and cracks easily
-
Secure the wood: fix the board to the workbench with woodworking clamps (so it does not move while brushing)
Step 2: Choosing the brush
The choice of brush directly decides how good the brushed result is.
- Handheld wire brush: precise control and low cost, suited to DIY and small areas
- Power wire wheel brush: highly efficient and more even over large areas, but it takes skill and easily removes too much
- Long-handled wire brush: suited to floors and large boards
Wire material:
- Carbon steel wire (the most common): removes the soft wood fibers effectively, but may leave rust marks on the wood surface (see Step 4 for how to deal with them)
- Stainless steel wire: does not rust easily and does not stain the wood, suited to light-colored wood
- Brass wire: removes material more gently, suited to a second touch-up pass or light brushing
💡 YC Brushes recommends: for wood grain brushing, use a 0.35-0.40mm carbon steel wire brush; for light-colored wood, switch to stainless steel wire to avoid rust stains.
Step 3: Brushing technique
This is the most important step: only with the right technique can you produce an attractive brushed texture.
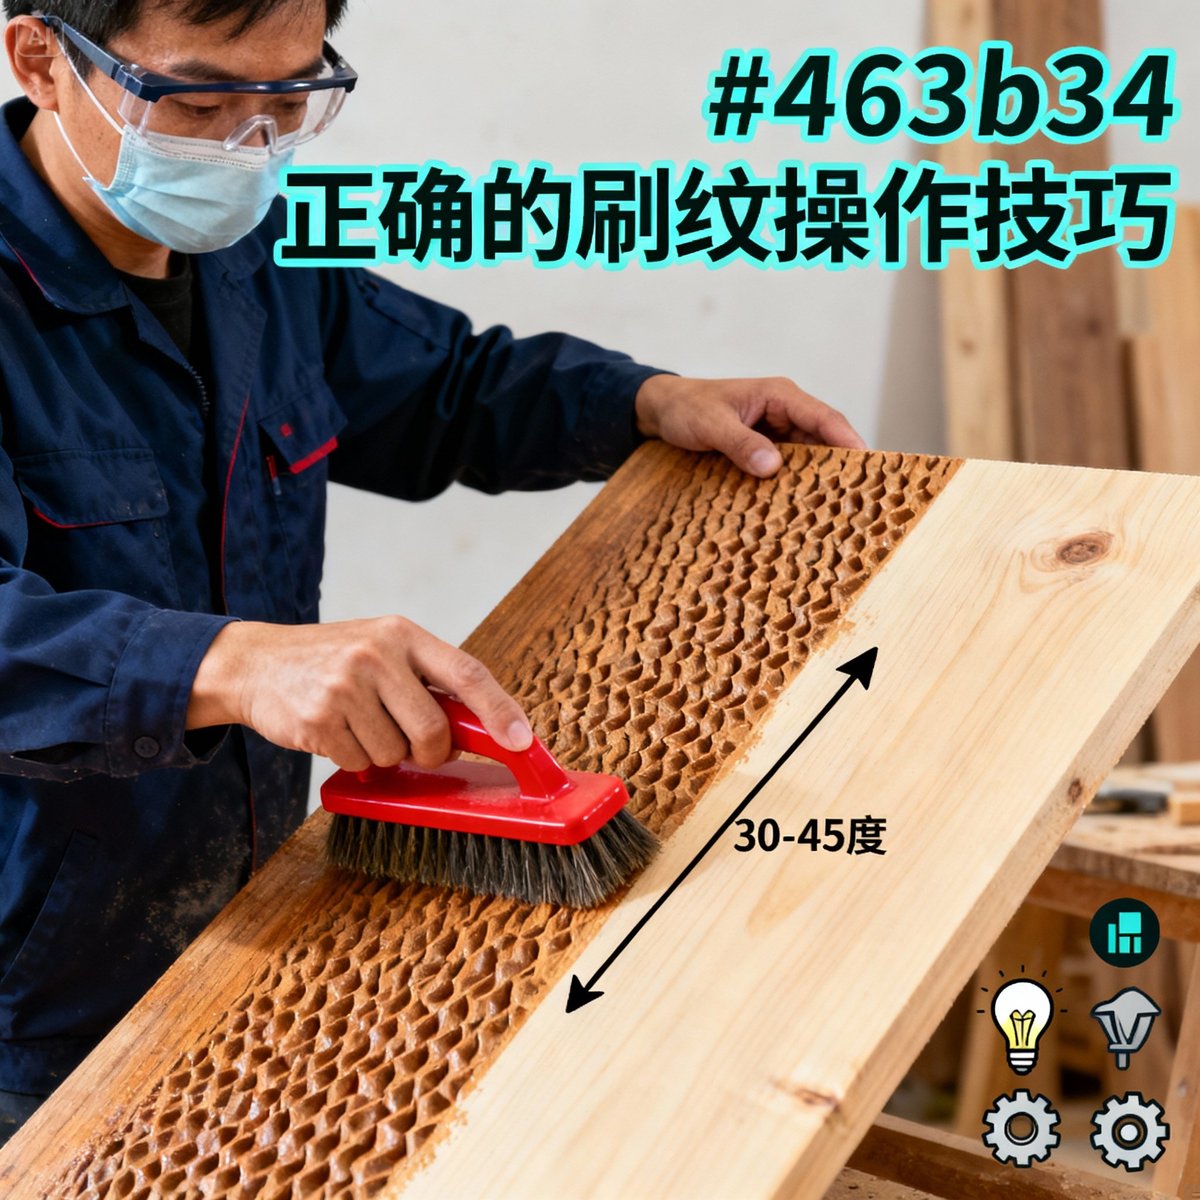
- Direction: always brush along the grain; brushing against the grain tears the wood fibers and leaves burrs
- Angle: hold the wires at about 30-45 degrees to the wood
- Force: moderate, steady force; brush lightly on the first pass to test the depth
- Speed: move slowly and steadily; too fast and the removal is uneven, too slow and it easily removes too much
- Repetition: repeat 3-5 times over the same area, and check the depth after every 2-3 passes (for the recommended number of passes for each wood, see "Brushing techniques for different woods" below)
🔧 Do you need professional wire brushes for grain brushing?
A real case: a furniture factory had been using poor-quality off-the-shelf wire brushes for wood grain brushing. The wires shed easily, the brushing depth was uneven, and the yield of finished pieces was only 70%. After switching to custom wire brushes from YC Brushes made for grain brushing, the brushing result became stable, wire durability improved 3 times, the yield rose to 95%, and rework costs fell by NT$15,000 per month.
How can YC Brushes help you?
✅ Over 40 years of experience with grain-brushing wire brushes: designed for woodworking, with a deep understanding of what different woods need ✅ The best wire diameter: 0.35-0.40 mm carbon steel wire or stainless steel wire, for the best brushing result ✅ Custom power brush wheels: a range of specifications for angle grinders and electric drills ✅ Durability guaranteed: every batch passes a 10,000-stroke brushing test, and the wires do not shed easily ✅ Free selection advice: we recommend the most suitable brush for the wood species and the brushing depth required ✅ Flexible order quantities: quantities and lead times for hand brushes and brush wheels are quoted per specification; please email us with your requirements
💡 Why choose YC Brushes?
- Proven with professional woodworking customers: we have served 50+ furniture factories, woodworking shops and interior fit-out companies
- Custom service: special wire diameters, brush head shapes and wheel diameters can all be customized
- Technical support: guidance on brushing operations and troubleshooting advice
Contact us now for a free grain-brushing technical consultation and sample testing!
👉 Click to contact YC Brushes now and let our team help you find the most suitable wire brush for grain brushing!
Step 4: Surface treatment and touch-up
After brushing, the surface needs to be treated to remove burrs and debris.
Dust removal and cleaning
- Coarse dust removal: blow off wood chips and wire fragments with an air gun or a hair dryer
- Fine dust removal: wipe the grooves with a soft brush or cloth to remove remaining wood dust
- Check for burrs: check for burrs of wood fiber that were not completely brushed away
Second sanding (optional)
If the surface has too many burrs or is uneven after brushing:
- Use 240-grit fine sandpaper: sand lightly along the grain
- Sand only the raised parts: keep the depth of the grooves
- Use very light pressure: avoid sanding away the brushed effect
⚠️ Note: sanding is only a touch-up. Do not overdo it, or the brushed effect will be weakened.
Removing rust marks (carbon steel wire brushes)
If a carbon steel wire brush is used, black or brown rust marks may appear on the wood surface:
Method 1: oxalic acid solution
- Prepare a 2-5% oxalic acid solution (available from hardware stores or chemical suppliers)
- Apply it to the rust marks with a brush or a sprayer
- Leave it for 10-15 minutes
- Rinse clean with water
- Let it dry completely before the next step
Method 2: wood bleach
- Use a dedicated wood bleach (such as a hydrogen peroxide type)
- Apply it to the rust marks and leave it according to the product instructions
- Rinse with water and leave to dry
Method 3: sanding
- Use 180-240 grit sandpaper
- Sand lightly along the grain to remove the surface layer of rust
- Suited to light rust marks
💡 Prevention is better than cure: using a stainless steel wire brush avoids rust contamination entirely, and is especially suited to light-colored woods.
Step 5: Finishing and protection
Once the brushing is done and the surface has been treated, the last step is a protective finish.
Choice of finish
The finish chosen for a brushed board affects how it finally looks and feels:
1. Hardwax oil (most recommended)
- Advantages: good penetration, keeps the feel of the wood, clear raised texture, natural look
- Disadvantages: weaker protection, needs regular maintenance
- Suitable for: indoor furniture, wall panels, ornaments
- How to apply: 1-2 thin coats with a cloth or brush, 4-6 hours apart
2. Wood protection oil
- Advantages: good water resistance, suited to outdoor use, extends the life of the wood
- Disadvantages: may fill in some of the grooves, feels oilier
- Suitable for: outdoor decking, terraces, fences
- How to apply: 2-3 brushed coats, 24 hours apart
3. Water-based coating
- Advantages: strong protection, wear and scratch resistant, eco-friendly and odorless
- Disadvantages: fills in the grooves, reduces the three-dimensional texture, feels more like plastic
- Suitable for: floors in commercial spaces, high-wear areas
- How to apply: 2-3 sprayed or brushed coats, sanding between coats
4. Oil-based coating (less common)
- Advantages: extremely strong protection, good gloss
- Disadvantages: fills in the grooves severely, loses the brushed feel, high VOC
- Not recommended: the three-dimensional feel of the brushed grain is lost completely
5. No finish (natural weathering)
- Advantages: the most original feel, eco-friendly
- Disadvantages: no protection, stains easily, absorbs moisture easily
- Suitable for: indoor ornaments, wall panels that are seldom touched
Finishing technique
Hardwax oil application (the most common):
-
Make sure the wood is completely dry: moisture content below 12%
-
First coat
- Apply the hardwax oil evenly with a cotton cloth or sponge
- Work along the grain and make sure it gets into the grooves
- A thin coat is enough; avoid applying it too thickly
-
Let it absorb: leave it for 10-15 minutes so the oil can penetrate
-
Wipe off the excess: wipe excess oil from the surface with a clean cotton cloth
-
Drying: leave it in a ventilated place to dry for 4-6 hours
-
Second coat (optional)
- For a deeper color or better protection, apply a second coat
- Wait at least 4 hours between coats
-
Final drying: ready to use after 24 hours; full curing takes 7 days
Coloring techniques (optional):
If you want a dark color or a special tone:
-
Wood stain: after brushing, first apply a coat of water-based or oil-based stain
- Dark stain collects in the grooves and creates a shadow effect
- The raised parts are lighter and the grooves darker, which adds depth
-
Two-tone treatment: a dark base color with a light surface
- First apply dark stain over the whole surface
- After it dries, sand the raised parts lightly with fine sandpaper to expose the lighter wood
- This creates a contrast of dark grooves and light ridges
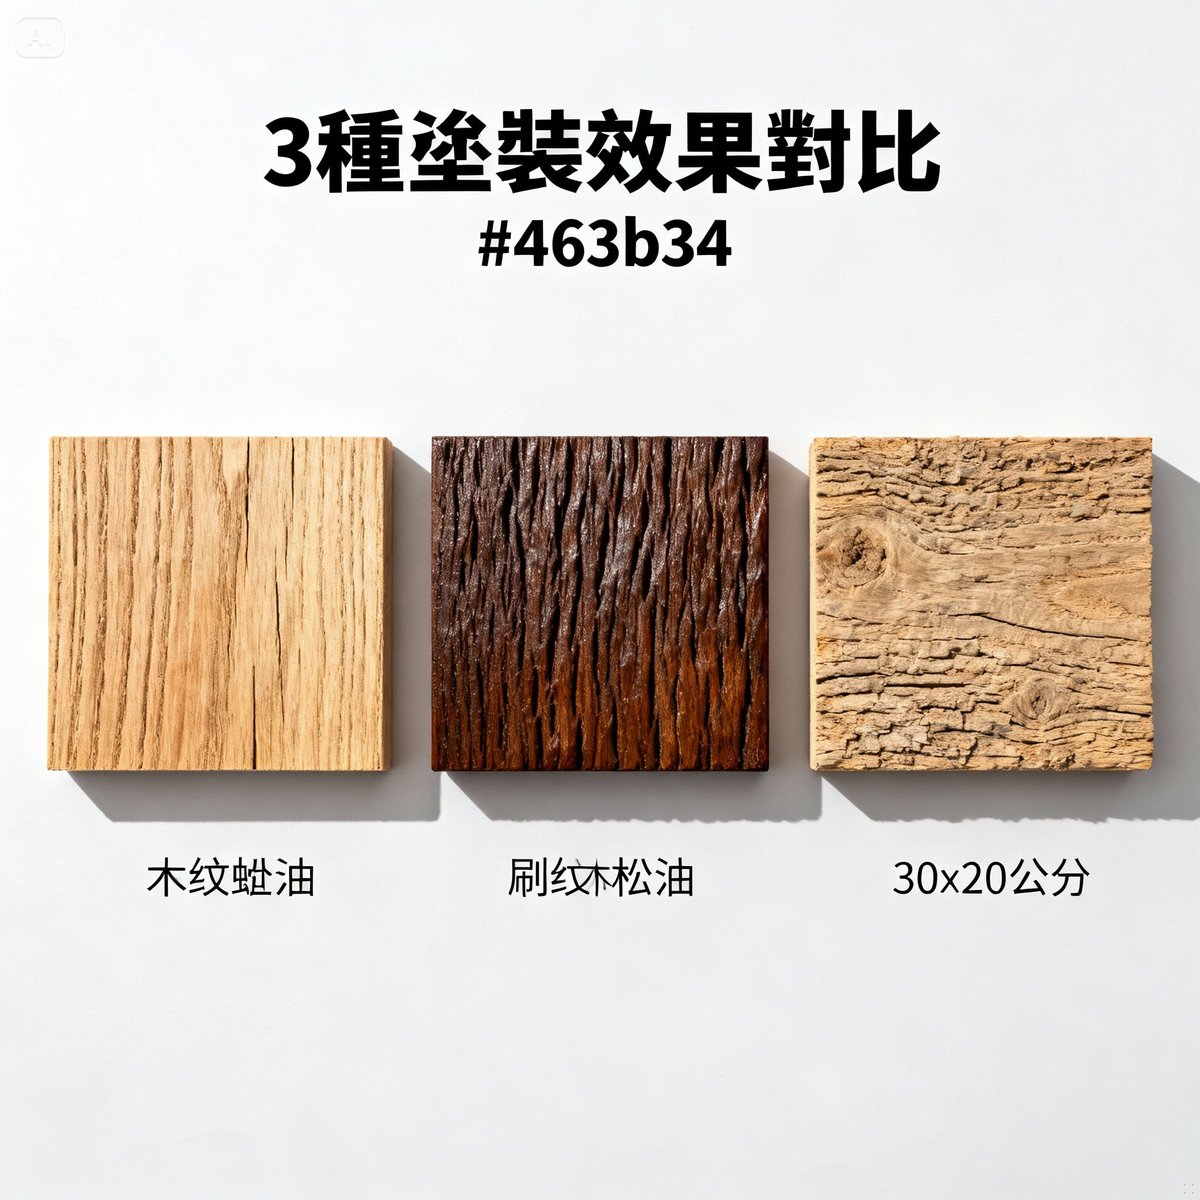
Brushing techniques for different woods
Different woods differ in soft/hard contrast and grain character, so the brushing technique also has to be adjusted.
Brushing pine
Characteristics: a very large soft/hard difference, distinct growth rings, the best wood for brushing
Key points:
- Wire diameter: 0.35-0.40 mm
- Pressure: light to medium (pine is soft and brushes away easily)
- Number of passes: 2-3 passes give a clear effect
- Note: pine is rich in resin, which may seep out after brushing and needs to be cleaned off
Best result: medium to deep brushing (0.5-1.5 mm)
Brushing fir
Characteristics: a large soft/hard difference, straight grain, a distinctive scent
Key points:
- Wire diameter: 0.35-0.40 mm
- Pressure: medium
- Number of passes: 3-4
- Feature: the scent of fir is released more noticeably after brushing
Best result: medium brushing (0.5-1.0 mm)
Brushing oak
Characteristics: higher hardness, three-dimensional grain, high value
Key points:
- Wire diameter: 0.40-0.50 mm (a thicker wire is needed)
- Pressure: medium to heavy (oak is harder)
- Number of passes: 4-6
- Suggestion: a power brush wheel is more efficient
- Note: oak is expensive, so practice on cheap wood first
Best result: light to medium brushing (0.3-0.8 mm)
Brushing birch
Characteristics: a moderate soft/hard difference, fainter grain, light color
Key points:
- Wire diameter: 0.35-0.40 mm
- Wire material: stainless steel wire is recommended (to avoid rust contamination of light-colored wood)
- Pressure: medium to fairly heavy
- Number of passes: 4-5
- Feature: the grain is faint and takes a few more passes to show clearly
Best result: light brushing (0.3-0.6 mm)
Common mistakes and solutions
Knowing the common mistakes helps you avoid failures and save material.
Mistake 1: brushing in the wrong direction
What it looks like:
- Brushing against the grain tears and lifts the wood fibers
- A rough surface with heavy burrs
- Unclear grain
Cause: brushing against the grain or at an angle to it
Solution:
- ✅ Look at the direction of the grain and always brush along the growth-ring grain
- ✅ Run your hand over the wood surface: the direction that feels smooth is the direction of the grain
Mistake 2: brushing too deep
What it looks like:
- Grooves that are too deep (more than 2 mm)
- The hard grain is brushed away as well
- The board becomes thinner and structurally weaker
- The board may even be brushed through
Cause: too much pressure, too many passes, or a wire diameter that is too thick
Solution:
- ✅ Test the effect with light pressure the first time
- ✅ Check the depth after every 2-3 passes
- ✅ Feel it by hand or measure with a depth gauge
How to recover: for a board that has already been brushed too deep, consider:
- Filling with wood filler (sawdust mixed with white wood glue)
- Accepting the deep-brushed look and using it for industrial-style interiors
- Planing it flat and starting again (at the cost of board thickness)
Mistake 3: uneven brushing depth
What it looks like:
- Some areas are brushed deep and others shallow
- The result looks inconsistent
Cause:
- Unsteady pressure when brushing by hand
- Inconsistent brushing speed
- Uneven hardness in the wood itself (knots)
Solution:
- ✅ Keep the brushing speed and pressure steady
- ✅ Work in sections and repeat the same number of passes in each
- ✅ Use a power brush wheel for a more even result
- ✅ Knots are harder: avoid them or give them a few more passes
Mistake 4: rust contamination
What it looks like:
- Black or brown rust marks on the surface of light-colored wood
- Especially visible in the grooves
Cause: a carbon steel wire brush was used and rust was deposited on the wood surface
Prevention:
- ✅ Use stainless steel wire brushes on light-colored woods (birch, oak)
- ✅ Remove rust from carbon steel wire brushes before use (soak in rust remover)
- ✅ Keep the wood away from water while brushing (moisture speeds up rusting)
How to recover:
- Remove the rust marks with oxalic acid solution or wood bleach (explained in Step 4)
Mistake 5: shed wires stuck in the grooves of the wood
What it looks like:
- Broken wires stuck in the grooves of the wood
- Hard to remove, and they affect the finish
Cause: a poor-quality brush with wires that are not held securely
Prevention:
- ✅ Choose good-quality wire brushes (such as those from YC Brushes)
- ✅ Check how securely the wires are held before using the brush
- ✅ Replace the brush when it is worn and shedding wires heavily
How to recover:
- Pick out the stuck wires one by one with tweezers
- Blow them out with high-pressure air from an air gun
- Pick them up with a magnet (carbon steel wire only)
Mistake 6: the finish fills in the brushed grain
What it looks like:
- The brushing was done well, but the raised texture disappears after finishing
- The surface feels smooth and the three-dimensional feel is lost
Cause:
- A high-viscosity oil-based or water-based coating was used
- Too many coats, or coats applied too thickly
- The oil was not allowed to soak into the grooves during finishing
Prevention:
- ✅ Prefer hardwax oil or wood protection oil (good penetration)
- ✅ Apply several thin coats, with enough time between them
- ✅ Avoid thick coats of oil-based coating
🎯 Professional advice: if you want the feel of brushed grain, never use an oil-based coating. Hardwax oil is the best choice: it protects the wood and keeps the feel.
Advanced brushing techniques
Once you have the basics, you can try advanced techniques for richer effects.
Two-tone brushed effect
Goal: dark grooves and light ridges, for a stronger three-dimensional contrast
Steps:
- Finish the brushing
- Apply dark stain over the whole surface (such as walnut or dark brown)
- Let it dry (6-8 hours)
- Sand the raised parts lightly with 320-grit fine sandpaper
- The raised parts expose the lighter wood while the grooves stay dark
- Finally, apply a coat of clear hardwax oil for protection
Effect: the aged look of antique furniture
Partial brushing
Goal: brush only some areas to create contrast
Applications:
- Furniture door panels: brushed center, smooth frame
- Tabletops: brushed edges, smooth center
- Wall panels: alternating brushed and smooth blocks
Technique:
- Mark out the brushed area with masking tape
- Keep the boundary sharp while brushing
Cross brushing (not recommended)
What it is: brushing once along the grain, then once at right angles to it
Effect: a grid-like texture
Note: this technique destroys the natural look of the grain and is seldom used. It is only suited to special artistic work
Brushing + charring
Goal: combine charred wood (Shou Sugi Ban) with brushing
Steps:
- First char the wood surface lightly with a torch
- After it cools, brush away the carbonized layer with a wire brush
- This creates a contrast of black grooves and wood-colored ridges
- Apply protective oil
Effect: a very modern black-and-white contrast texture
⚠️ Safety warning: charring wood must be done outdoors or in a ventilated place. Have fire-extinguishing equipment ready and pay attention to fire safety.
Tool care and maintenance
The service life and care of grain-brushing wire brushes directly affect working efficiency.
Cleaning after use
-
Clear away wood chips immediately
- Remove wood chips from between the wires with an air gun or a brush
- Leftover chips affect the result of the next brushing
-
Check the wires
- Check for bent or broken wires
- Grip broken wires at the root with pliers and pull them out
-
Rust prevention (carbon steel wire brushes)
- Spray with anti-rust oil or WD-40
- Wipe off the excess oil with a cloth
- This avoids contaminating the wood the next time the brush is used
-
Dry storage
- Hang to dry and avoid damp environments
- Store with the brush head down or lying flat (to keep the wires from deforming)
Care of power brush wheels
-
Cleaning after use
- Remove the brush wheel and clear away the wood chips
- Blow out the gaps between the wires with an air gun
-
Check the center hole regularly
- Make sure the center hole is not worn or deformed
- Make sure it is tightened securely when mounted
-
Storage
- Lay flat or hang
- Avoid heavy loads on top (the wires will deform)
Brush service life
| Brush type | Area brushed (square meters) | Service life |
|---|---|---|
| Hand-held carbon steel wire brush | 5-10 | 3-6 months |
| Hand-held stainless steel wire brush | 8-15 | 6-12 months |
| Wire wheel brush for angle grinders | 50-100 | 6-12 months |
| Wire brush head for electric drills | 3-8 | 3-6 months |
Tips for a longer service life:
- Avoid excessive force
- Clean and maintain regularly
- Use the appropriate rotation speed
- Keep several brushes and rotate them
💰 Cost calculation: taking a hand-held carbon steel wire brush as an example, it can brush about 5-10 square meters of board and the brush itself is inexpensive, so the processing cost per square meter works out far lower than the price of buying ready-made brushed boards.
Market applications and commercial value
Understanding the market applications of brushed boards helps in assessing the return on investment.
Market prices of brushed boards
| Wood species | Smooth board price level | Brushed board price level | Price increase |
|---|---|---|---|
| Pine | Budget | Mid-range | Clearly higher |
| Fir | Budget | Mid-range | Clearly higher |
| Oak | High | Higher still | Clearly higher |
| Birch | Mid to high | High | Clearly higher |
Market observations:
- On average, brushed boards sell for considerably more than smooth boards
- If you do the brushing yourself, the added cost is relatively limited (brushes, finishes)
- The commercial value is clear
Who is suited to taking up grain brushing
-
Furniture factories
- Invest in power brushing equipment (a higher equipment investment)
- Volume production of brushed tabletops, cabinet doors and headboards
- Raise product value and competitiveness
-
Woodworking and interior fit-out companies
- Offer custom brushed board services
- A differentiated competitive advantage
- An additional source of revenue
-
DIY woodworking enthusiasts
- A hand-held wire brush is enough to start (low cost)
- Make one-of-a-kind furniture or decorations
- Save the cost of buying brushed boards
-
Timber suppliers
- Offer a brushing service
- Charge a reasonable processing fee per square meter
- Create extra income
Success stories
Case 1: a small furniture studio
- Investment: 10 hand-held wire brushes + 2 power brush wheels, a modest total outlay
- Application: a custom brushing service for dining tables and coffee tables
- Benefit: each brushed dining table can be sold at a clearly higher price, and the investment usually pays for itself within a few months
Case 2: a DIY woodworking enthusiast
- Investment: 2 carbon steel wire brushes + hardwax oil, a modest total outlay
- Application: home-made brushed bookshelves and TV cabinets
- Benefit: saves the cost of buying ready-made brushed furniture, a considerable saving
Case 3: an interior fit-out company
- Investment: a professional brushing machine (a higher equipment investment)
- Application: brushed wall panel and flooring projects for commercial spaces
- Benefit: annual revenue can be expected to rise clearly, with payback within a few years
📊 Market outlook: there is steady demand for brushed boards in the mid to high-end furniture and interior design markets. For the actual market size and growth rate, please refer to the latest figures published by trade associations or research institutes.
FAQ
Can every kind of wood be brushed?
No. Only woods with a clear difference between soft and hard grain are suited to brushing.
Best suited to brushing (★★★★★):
- Pine, fir, Japanese cedar: a very large soft/hard difference and deep grain
- Oak: a high-value wood with a good brushing result
Not suited to brushing (★☆☆☆☆):
- Plywood, MDF: no natural growth rings
- Maple, cherry: uniform hardness, little soft/hard difference
- Red sandalwood, rosewood: extremely hard, difficult to brush away
How to judge: Look at the cross-section of the wood. The greater the difference between the light and dark colors of the growth rings, and the clearer the soft/hard difference, the better suited it is to brushing.
Which is better, hand brushing or power brushing?
It depends on the size of the area and on your experience.
Hand-held wire brush:
- Suitable for: small areas (below 3 m²), fine control, DIY beginners
- Advantages: low cost (a low barrier to entry), precise control, safer
- Disadvantages: hard work, low efficiency, hard to keep large areas even
Power brush wheel:
- Suitable for: large areas (more than 5 m²), professional production, experienced users
- Advantages: high efficiency (5-10 times faster), less effort, good evenness
- Disadvantages: higher cost, needs skill, carries safety risks
Recommendation:
- First attempt: practice with a hand brush
- Once you have the technique, move up to a power brush wheel for large areas
- Professional shops: invest directly in a power brushing machine
Does brushing reduce the strength of the wood?
Normal brushing does not significantly reduce strength, but excessive brushing does.
Normal brushing (depth 0.5-1.5 mm):
- Removes only the surface layer of soft wood fibers
- Has very little effect on the overall structure of the wood
- Does not affect normal use
Excessive brushing (depth more than 2 mm):
- May brush away part of the hard wood layer
- Reduces the thickness of the wood
- Structural strength may fall
Safety advice:
- Brush only boards that are at least 1.5 cm thick
- Keep the brushing depth within 0.5-1.5 mm
- Brushing is not recommended for structural load-bearing parts (such as beams and columns)
Does the wood have to be finished after brushing?
Not necessarily, but a finish is recommended to protect the wood.
Risks of leaving it unfinished:
- Absorbs moisture easily and warps when damp
- Stains easily and is hard to clean (dust collects in the grooves)
- Vulnerable to insect damage and mold
- The wood weathers naturally and fades
When leaving it unfinished is acceptable:
- Indoor ornaments (not touched, not load-bearing)
- Artistic work that seeks the original texture
- Short-term display
When a finish is recommended:
- Furniture (tabletops, cabinet doors)
- Floors, wall panels
- Outdoor applications
- Situations that need water and stain resistance
Suggested finish: hardwax oil or wood protection oil, which keeps the feel and provides protection.
Can rust contamination be removed completely?
It depends on how severe the rust marks are. Light marks can be removed completely; heavy marks are more difficult.
Light rust marks (light brown, small area):
- Use oxalic acid solution or wood bleach
- Combine with light sanding
- Can be removed completely
Moderate rust marks (dark brown, larger area):
- Several treatments with oxalic acid solution
- Sand away the surface layer
- Most of it can be removed
Heavy rust marks (black, deep in the wood):
- Difficult to remove completely
- Sanding would destroy the brushed effect
- You may have to accept them or plane the board flat again
Prevention is better than cure:
- Use stainless steel wire brushes on light-colored woods
- Remove rust from carbon steel wire brushes before use
- Keep the wood dry while brushing
💡 Advice from YC Brushes: a professional woodworking shop should keep both carbon steel wire brushes and stainless steel wire brushes and choose according to the color of the wood. Carbon steel wire is inexpensive and suited to dark woods; stainless steel wire leaves no rust marks and is suited to light woods.
Does the moisture content of the wood change after brushing?
Brushing itself does not change the moisture content significantly, but the treatments that follow may.
The effect of brushing on moisture content:
- Brushing is only mechanical processing and involves no water
- After brushing, the surface area of the wood increases (an uneven surface)
- In theory moisture is absorbed slightly faster, but the effect is very small
Steps that do change the moisture content:
-
Removing rust with oxalic acid solution: the wood absorbs water and the moisture content rises
- Solution: dry thoroughly after treatment until the moisture content returns to normal
-
Water-based staining or finishing: water enters the wood
- Solution: dry after finishing until the moisture content is stable
-
Natural drying: leaving the wood in a dry environment after brushing
- Solution: monitor with a moisture meter and apply the finish once it reaches 8-12%
Recommendations:
- Confirm that the moisture content of the wood is 8-12% before brushing
- After any wet treatment (rust removal, water-based coatings), measure again
- Apply the final finish or install the board only after the moisture content is stable
Conclusion: giving wood a second life with a wire brush
Wire-brushing wood grain looks simple, but there is a great deal of woodworking know-how in it. With the right wood, the right brushes, the right technique and the right surface treatment, ordinary wood can become a high-quality textured wood grain board, with a clear rise in value.
5 keys to successful wire-brushed wood grain
- Choose the right wood: pine, fir and oak are the most suitable; the soft/hard difference is the key
- Use the right brush: 0.35-0.40 mm carbon steel wire or stainless steel wire, with a hand brush or power brush wheel chosen to suit the job
- Master the technique: brush along the grain, at an angle of 30-45 degrees, with medium pressure and a steady speed, repeating 3-5 times
- Surface treatment: dust removal, rust removal and a second sanding (as needed)
- The right finish: hardwax oil is best, keeping the feel while providing protection
Advice for beginners
For a first attempt at grain brushing, we suggest starting like this:
- Buy 1-2 pine boards (30x30 cm, 2 cm thick)
- Have 1 hand-held carbon steel wire brush ready (0.35-0.40 mm)
- One pack each of 120-grit and 240-grit sandpaper
- 1 can of hardwax oil (light-colored or clear)
- Protective gear (safety goggles, mask, gloves)
- Total investment: a modest entry cost
First practice session:
- Sand the surface of the pine board (120-grit sandpaper)
- Brush along the grain 3-5 times with the wire brush
- Remove the dust and check the result
- Sand lightly with 240-grit sandpaper to remove burrs
- Apply 1-2 coats of hardwax oil
- Let it dry for 24 hours, and it is done!
Professional support from YC Brushes
For over 40 years, YC Brushes has focused on making all kinds of brushes and has served countless woodworking shops, furniture factories and DIY enthusiasts. We offer:
✅ Professional wire brushes for grain brushing: hand brushes, power brush wheels, custom specifications ✅ A choice of wire materials: carbon steel wire, stainless steel wire and brass wire, in diameters of 0.30-0.50 mm ✅ Free technical advice: guidance on brushing operations and troubleshooting ✅ Custom service: special specifications, discounts for large orders
🎯 Ready to start your grain-brushing woodworking journey? Contact YC Brushes now for free brush selection advice and a grain-brushing technical consultation!
Whether you want to make a unique brushed dining table for your home or you run a furniture factory and want to raise the value of your products, wire-brushing wood grain is a skill worth investing in. With one wire brush you can give ordinary wood a second life and let time and craft show through the grain.
📚 Further reading
- The complete guide to wire brushes | Uses, selection, rust removal techniques and industrial applications
- Long-handle wire brush buying guide | An essential tool for cleaning wheel rims, with 7 buying points
- The ultimate guide to choosing between steel and brass brushes | Material differences and applications explained
- Safe use of wire brushes on angle grinders | 10 key points for avoiding workplace accidents
Content reviewed by: the YC Brushes R&D team (over 40 years of brush manufacturing experience) Want to know more about grain-brushing techniques or how to choose a brush? You are welcome to contact YC Brushes and we will be glad to help!